
Table of Contents- What Is Contact Form 7 to Google Sheets Integration?
- Why Contact Form 7 Needs Google Sheets
- Free vs. Pro: What Each Version Actually Includes
- Prerequisites Before You Start
- How to Connect CF7 to Google Sheets (Free Version)
- How to Connect CF7 to Google Sheets (Pro Version)
- Compatible CF7 Addons and Field Types
- Advanced: Sending Repeatable Fields to Google Sheets (Developer Snippet)
- Common Mistakes & Troubleshooting
- Best Practices for Managing CF7 Data in Google Sheets
- Frequently Asked Questions
- Conclusion
Contact Form 7 to Google Sheets integration connects your Contact Form 7 forms with Google Sheets so every submission is written into a spreadsheet in real time, without email, CSV exports, or code. This guide covers the free method, the Pro method, a full feature comparison, and the errors people run into most often.
Fact: As of today, GSheetConnector for CF7 has 40,000+ active installations, 965,945+ total downloads, and a 4.4/5 rating from 127 reviews on WordPress.org.
What Is Contact Form 7 to Google Sheets Integration?
Contact Form 7 to Google Sheets integration is a plugin connection that automatically copies each form submission — every field value plus metadata like the submission date — into a row of a Google Sheets spreadsheet the moment the form is submitted.
Contact Form 7 was built to be lightweight: it sends an email and stops there. It has no entries table, no dashboard, and no export option. A connector plugin like GSheetConnector for CF7 sits between the form and Google's Sheets API, sending each submission straight into a spreadsheet you control.

Why Contact Form 7 Needs Google Sheets
Contact Form 7's minimalism is intentional — it's why the plugin is installed on millions of sites. But it leaves a few real gaps:
- No entries table: submissions only exist as email, unless you add another plugin.
- No filtering or search: you can't sort by date or filter by a specific field.
- No easy team sharing: giving someone access means forwarding emails or sharing your inbox.
- No backup if email fails: a broken SMTP setup or a message landing in spam means the entry is gone.
Sending submissions to Google Sheets solves all four — every entry becomes a searchable, shareable, exportable row.
Free vs. Pro: What Each Version Actually Includes
Here is the real, current feature split for GSheetConnector for CF7:
| Feature | Free | Pro |
|---|---|---|
| Real-time submission sync | ✅ | ✅ |
| Google Sheets API v4 | ✅ | ✅ |
| One-click Google authentication | ✅ | ✅ |
| Manually add Sheet Name / Tab Name | ✅ | ✅ |
| Click & Fetch sheets automatically | ❌ | ✅ |
| Create a new Sheet from plugin settings | ❌ | ✅ |
| Enable/disable & rename column headers | ❌ | ✅ |
| File/attachment links in sheet | ❌ | ✅ |
| CF7 Special Mail Tags support | ❌ | ✅ |
| Custom Mail Tags | ❌ | ✅ |
| Conditional Logic (send only if X) | ❌ | ✅ |
| Manual Google Cloud / Service Account setup | ❌ | ✅ |
| CF7 Database (searchable entries inside WP) | ❌ | ✅ |
| Action & Filter Hooks for developers | ❌ | ✅ |
| Multiple forms → multiple sheets | ❌ | ✅ |
| Role-based access management | ❌ | ✅ |
| Priority support | ❌ | ✅ |
In short: the free version reliably syncs one form to one sheet with manual setup — genuinely enough for a single contact form on a small site. Pro is worth it once you have more than one form, need file attachments, want conditional routing, or want a searchable local database as a safety net.
See full Pro pricing and features →
Prerequisites Before You Start
- Contact Form 7 installed with at least one form already built
- A Google account (Gmail or Workspace) to own the spreadsheet
- WordPress admin access
- Named fields in your CF7 form tags — the connector maps columns to these names
How to Connect CF7 to Google Sheets (Free Version)
Step 1 — Install Contact Form 7
Go to Plugins → Add New, search “Contact Form 7,” click Install Now, then Activate.

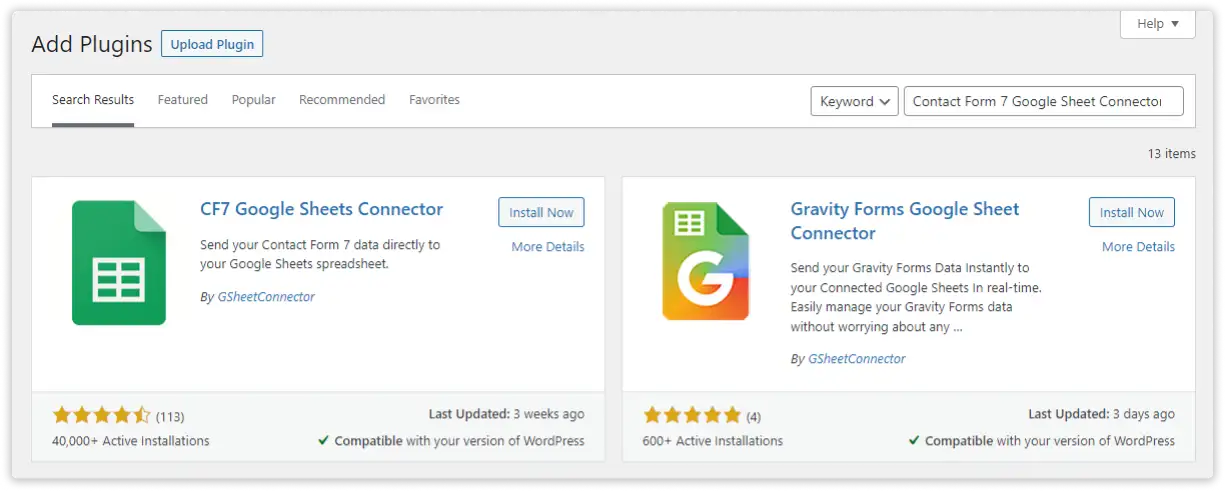
Step 2 — Install GSheetConnector for CF7
Go back to Plugins → Add New, search “CF7 Google Sheet Connector,” click Install Now, then Activate.
Step 3 — Authenticate with Google
Open the Google Sheet tab under your Contact Form 7 form settings, click Get Code, sign in with the Google account that owns your spreadsheet, and grant the requested Google Drive and Google Sheets permissions. Copy the authorization code back into the plugin and save.
Step 4 — Add Your Sheet and Tab Details
In the free version, manually enter your Sheet Name, Sheet ID, Tab Name, and Tab ID (found in your spreadsheet's URL and tab settings). In row 1 of your sheet, add column headers that match your CF7 field names exactly.
Step 5 — Test the Integration
Submit a test entry through your live form and confirm the new row appears in the connected sheet immediately. If it doesn't, check the Troubleshooting section below before assuming it's broken.
How to Connect CF7 to Google Sheets (Pro Version)
Step 1 — Download and Install Pro
After purchasing, you'll receive an email with your download link and license key. If the link expires, log in to My Account → Purchase History → View Details and Downloads to re-download the plugin and copy your license key.

In your WordPress dashboard, go to Plugins → Add New → Upload Plugin, choose the downloaded ZIP file, click Install Now, then Activate.

Step 2 — Activate Your License
Paste your license key into the License tab in the plugin settings and click Save. Once validated, all Pro features and configuration tabs unlock.

Step 3 — Authenticate with Click & Fetch
Pro adds Click & Fetch: after Google authentication, your existing spreadsheets appear in a dropdown, so there's no need to manually enter Sheet ID/Tab ID. The manual method from the free version is still available if you manage a very large number of sheets.
Step 4 — Configure Feeds
Pro is built around feeds — each feed connects one CF7 form to one sheet, so a single site can run multiple forms into multiple spreadsheets. Add a feed, name it, select or create the target sheet, then map fields to columns using the enable/disable/rename toggles.
Step 5 — Set Up Conditional Logic (Optional)
If you only want certain submissions synced — for example, only entries where a specific field meets a condition — configure this under Conditional Logic in the feed settings. See the full Conditional Logic documentation.
Step 6 — Test and Verify
Submit a test entry per form/feed and confirm each lands in its correct sheet. Pro also logs entries in the CF7 Database, giving you a second, searchable record inside WordPress even if the Sheets sync has an issue.
Compatible CF7 Addons and Field Types
The connector works alongside the standard CF7 ecosystem, including:
- File uploads — Pro can save uploads to Google Drive and add the file link directly into the sheet row. See how to save uploaded files to Google Drive.
- CF7 Special Mail Tags — official CF7 tags like submission date/time can be passed into sheet columns.
- Custom Mail Tags — for values that aren't standard CF7 fields.
- Action and Filter Hooks — for developers who need to customize sync behavior beyond the settings UI.
If you build forms with a page builder instead of CF7 shortcodes, GSheetConnector has separate dedicated addons for Elementor Forms, Divi Forms, and Avada Forms.
Advanced: Sending Repeatable Fields to Google Sheets (Developer Snippet)
If you use the CF7 – Repeatable Fields plugin alongside GSheetConnector, repeatable field groups won't map to sheet columns automatically, since each submission can contain a variable number of repeated values. CF7 Google Sheet Connector Pro exposes a filter hook, gsc_filter_form_data, specifically to handle this case.
Add the following to your child theme's functions.php file (never edit a parent theme directly, since updates will overwrite your changes):
/**
 * Hook - apply_filters( 'gsc_filter_form_data', $data, $form );
 * Repeatable Fields have multiple values, so we pass them to
 * Google Sheets as an array of rows.
 */
add_filter('gsc_filter_form_data', function ($data, $form) {
    $output = [];

    // Replace 147, 170 with your actual Contact Form 7 form IDs
    if (in_array($form->id(), [147, 170])) {
        $posted_data = WPCF7_Submission::get_instance()->get_posted_data();
        $row = $data;

        // Count how many repeated groups were submitted
        $counter = 0;
        foreach ($posted_data as $key => $values) {
            if (is_numeric(strpos($key, "your-email"))) {
                $counter = $counter + 1;
            }
        }

        // Build one row per repeated group
        for ($i = 1; $i <= $counter; $i++) {
            $row['your-email'] = $posted_data['your-email__' . $i];
            $row['your-radio'] = $posted_data['your-radio__' . $i][0];
            $row['your-menu'] = $posted_data['your-menu__' . $i][0];
            $row['your-checkbox'] = $posted_data['your-checkbox__' . $i][0];

            $output[] = $row;
        }
    }

    return $output;
}, 10, 2);
Two things to change for your own form: replace 147, 170 with your own Contact Form 7 form IDs (found in the form's edit URL), and replace the field names (your-email, your-radio, etc.) with your actual repeatable field names.
Full reference: Action and Filter Hooks – PRO Version documentation.
Common Mistakes & Troubleshooting
New Entries Aren't Showing Up in the Sheet
The most common causes are an incorrect authorization code, incomplete Google Drive/Sheets permissions during authentication, or a mismatch between the Sheet Name, Sheet ID, Tab Name, Tab ID entered in the plugin and your actual spreadsheet. Check the plugin's debug log first to see the actual API error. See our full guide on fixing missing entries caused by Google quota limits.
“Google Hasn't Verified This App”
This is a standard Google OAuth screen, not a plugin bug — it appears because the app hasn't completed Google's formal verification review. You can proceed via “Advanced → Go to [app name] (unsafe)” if you trust the source. Full walkthrough: How to Fix the “Google Hasn't Verified This App” Issue.
Column Headers Don't Match Field Data
If data lands in the wrong columns, your sheet's header row doesn't match your CF7 field names exactly, including case and spacing. This is the single most common mistake in the free version, since it doesn't auto-fetch or auto-map headers.
Best Practices for Managing CF7 Data in Google Sheets
- In Pro, Don't manually edit the header row without also updating the plugin's field mapping — they must stay in sync.
- Use a dedicated sheet per form rather than one shared sheet for multiple forms, to avoid column mismatches.
- In Pro, enable the CF7 Database as a redundant local record, so a temporary Google API outage doesn't cost you a submission.
- Restrict Google Sheet sharing permissions to only the team members who need access — the plugin syncs the data, but Google Sheets sharing settings control who can see it.
Ready to automate this without manual sheet setup? See what's included in Pro →
Frequently Asked Questions
Does Contact Form 7 send data to Google Sheets by default?
No. Contact Form 7 only sends form data by email out of the box. A separate plugin, like GSheetConnector for CF7, is required to sync submissions to a Google Sheet.
Is the Contact Form 7 to Google Sheets connector free?
Yes. A free version on WordPress.org supports form with one sheet, real-time sync, and manual sheet configuration. The Pro version adds multiple sheets, file attachments, conditional logic, and a searchable database.
Do I need coding knowledge to connect CF7 to Google Sheets?
No. Setup happens entirely through the WordPress admin dashboard and Google's OAuth sign-in. A fully manual Google Cloud/service account method is also available for advanced users who prefer it.
Can I send CF7 file uploads to Google Sheets?
Not the file itself into a cell, but the Pro version can add a link to the uploaded file, stored in uploads/cf7gs or Google Drive, directly in the corresponding sheet row.
Why does Google show “This app isn't verified” while using Manual Method?
This is Google's standard OAuth screen for apps that haven't completed Google's app-verification review. It doesn't mean the plugin is unsafe — you can proceed via the “Advanced” option if you trust the source.
Can one Contact Form 7 form send data to multiple Google Sheets?
Yes, in the Pro version, using multiple feeds — each feed can route the same form's data to a different sheet, or route different forms to different sheets.
What happens to old submissions if I install this after my form has been live for a while?
The connector only syncs new submissions from the point of installation forward. It can't retroactively pull past entries, since CF7 never stored them anywhere to begin with.
Does this work with Contact Form 7's Special Mail Tags?
Yes, Pro supports CF7 Special Mail Tags such as submission date, time, and IP address, alongside its own custom mail tags.
Is my form data secure with this integration?
Yes. Data is sent directly from your WordPress site to your own Google account through Google's official Sheets API — it isn't routed through or stored on any third-party server.
How is this different from using Zapier to connect CF7 to Google Sheets?
Zapier requires a separate paid account with its own monthly task limits and adds an external dependency. A dedicated plugin runs the sync directly between WordPress and Google's API on a one-time or annual license instead of a per-task subscription. See our full Zapier alternative comparison for details.
Conclusion
Contact Form 7 was never built to store your data — that's what keeps it lightweight. Whether you need a simple free connection for a single form, or a full multi-feed Pro setup with file uploads and conditional routing, connecting CF7 to Google Sheets turns your form into a real, searchable data source your whole team can use.
Upgrade to CF7 Google Sheet Connector Pro →
Or download the free version on WordPress.org →


 CF7 Google Sheet Connector
 WPForms Google Sheet Connector
 Ninja Forms Google Sheet Connector
 Gravity Forms Google Sheet Connector
 Formidable Forms Google Sheet Connector
 Forminator Forms Google Sheet Connector
 Fluent Forms Google Sheet Connector
 JetFormBuilder Google Sheet Connector
 Elementor Forms Google Sheet Connector
 Avada Forms Google Sheet Connector
 Divi Forms Google Sheet Connector
 WooCommerce Google Sheet Connector
 Easy Digital Downloads Google Sheet Connector
 WordPress Google Sheet Connector