Introduction
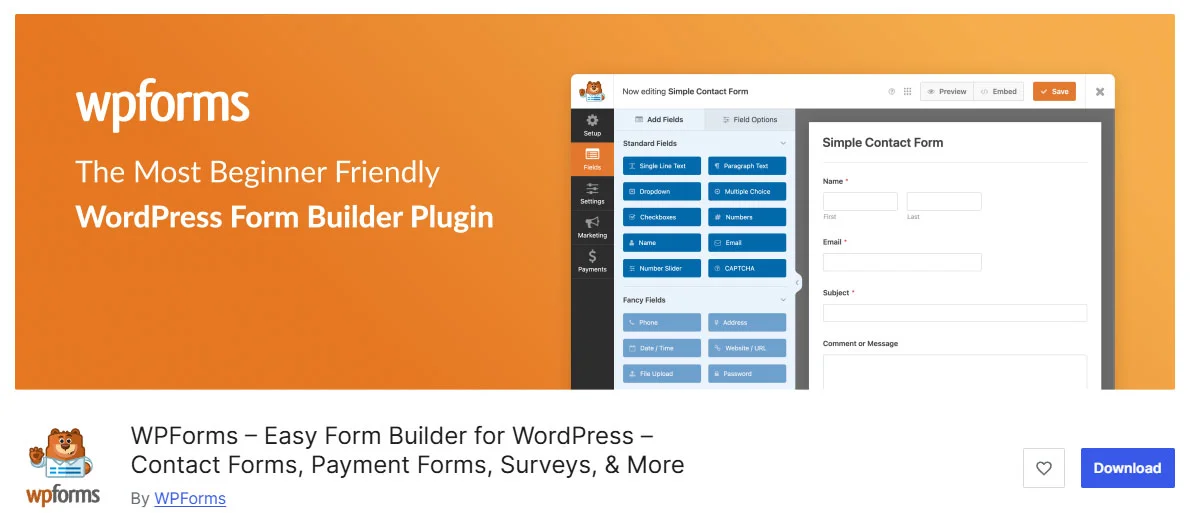
WPForms is one of the most user-friendly and powerful WordPress form builder plugins available. It allows beginners to create beautiful, fully functional forms without any coding. Whether you need a contact form, feedback form, or a payment form, WPForms makes the process simple and efficient.
In this article, we’ll walk you through the process of setting up WPForms, customizing your forms, and optimizing them for your website. This guide is designed to help beginners get started while ensuring the article ranks well for SEO.
Why Choose WPForms?
WPForms stands out for several reasons:
- Drag-and-Drop Builder: Create forms visually without touching code.
- Pre-built Templates: Save time with ready-to-use form templates.
- Mobile-Friendly: All forms are responsive and look great on any device.
- Integration Options: Seamlessly connect with email marketing services, payment gateways, and more.
- Spam Protection: Built-in features like CAPTCHA and reCAPTCHA to prevent spam.
Step-by-Step Guide to Setting Up WPForms
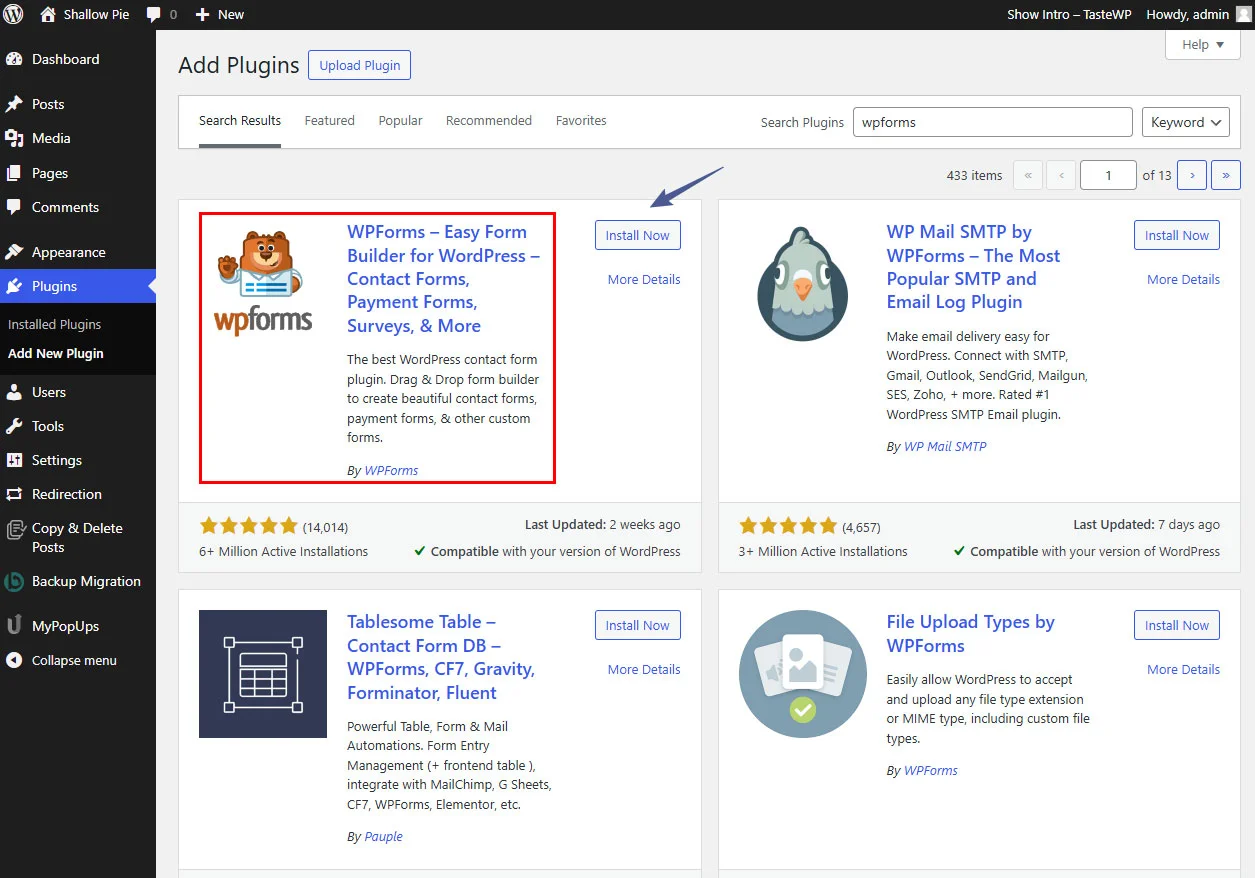
Step 1: Install and Activate WPForms
- Log in to your WordPress dashboard.
- Go to Plugins » Add New.
- In the search bar, type “WPForms” and click Install Now.
- Once installed, click Activate to enable the plugin.
Step 2: Create a New Form
- Navigate to WPForms » Add New from your WordPress dashboard.
- Choose a form template that suits your needs (e.g., Contact Form, Feedback Form).
- Use the drag-and-drop builder to add, remove, or customize fields.
- Click Save when your form is ready.


Step 3: Embed the Form on Your Website
- Copy the shortcode displayed after saving your form.
- Go to the page or post where you want the form to appear.
- Paste the shortcode into the content editor.
- Publish or update the page to make the form live.
Setting Up Notifications in WPForms: Step-by-Step Guide
Notifications in WPForms ensure you never miss a submission. They send email alerts whenever a user fills out and submits a form. Follow these steps to configure notifications:
Step 1: Access Notification Settings
- Log in to your WordPress dashboard and go to WPForms » All Forms.
- Select the form you want to configure notifications for and click Edit.
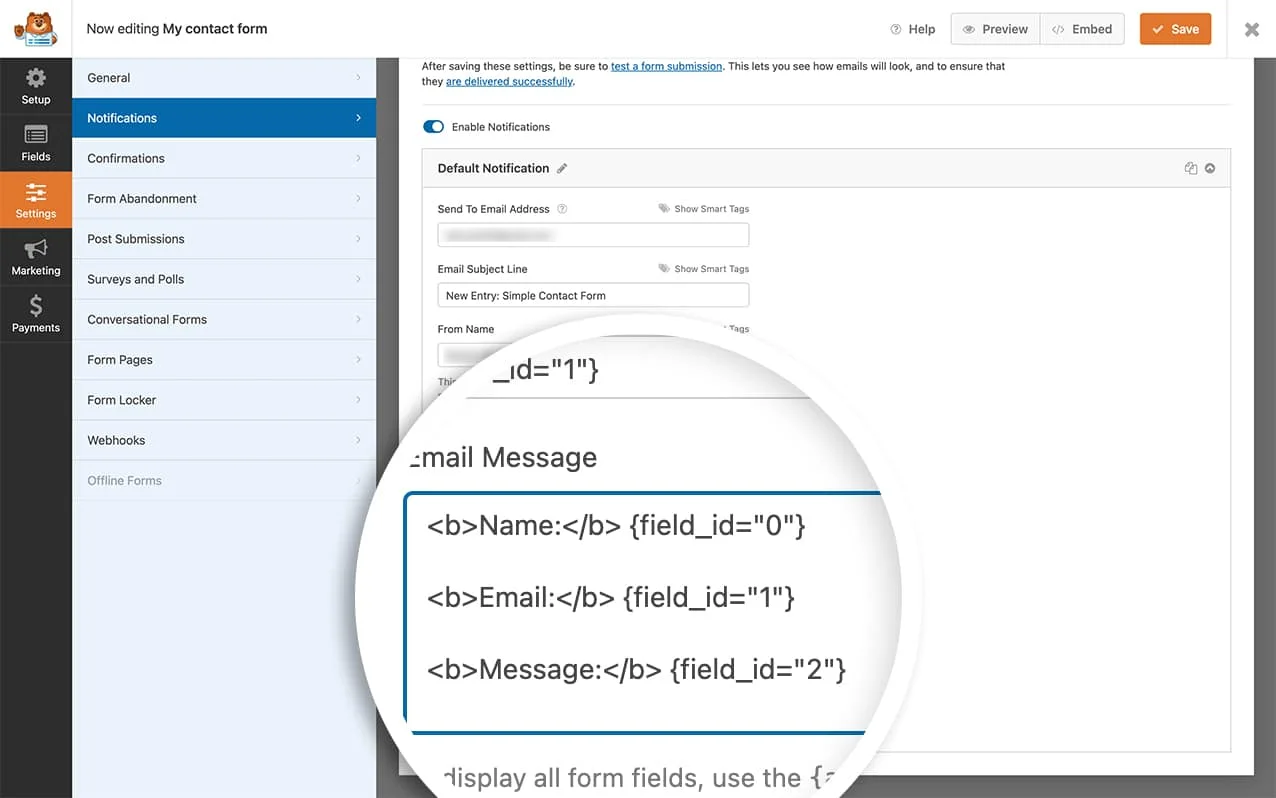
Step 2: Open Notification Settings
- Inside the form builder, navigate to Settings » Notifications.
- You’ll see a default notification already set up. Click to expand it.
Step 3: Customize Notification Details
- Send To Email Address:
Specify the recipient’s email address. You can use{admin_email}to send notifications to the site administrator. - Email Subject:
Personalize the subject line for better organization (e.g., “New Contact Form Submission”). - From Name:
Define who the notification is from. Use your website or business name for clarity. - From Email:
Use a valid and recognizable email address to avoid deliverability issues. - Message:
Customize the message body. Use smart tags to include specific form fields dynamically (e.g.,{name},{email},{message}).
Step 4: Add Additional Notifications (Optional)
- Click Add New Notification to set up multiple recipients or custom notifications.
- Use conditional logic (Pro feature) to send notifications based on user input.
Step 5: Save and Test Notifications
- Save your changes.
- Submit a test form to ensure notifications are received properly.
Pro Tips for Notifications in WPForms:
- Use Custom Email Services: Enhance email deliverability by integrating WP Mail SMTP with WPForms.
- Set Up Admin and User Notifications: Notify admins of submissions and send confirmation emails to users simultaneously.
- Enable Logging: Use logging tools to debug and verify notification delivery.
Customizing Your WPForms
Using the Form Builder
- Drag and drop additional fields like text boxes, dropdowns, checkboxes, or file uploads.
- Adjust field labels, placeholders, and descriptions to guide users.
Styling Your Forms
WPForms adopts your theme’s styles by default. However, you can customize the appearance using these methods:
- Navigate to Appearance » Customize » Additional CSS.
- Add custom CSS to style your form elements. For example:
.wpforms-form input,
.wpforms-form textarea {
    border: 1px solid #ccc;
    padding: 10px;
    font-size: 16px;
}

.wpforms-submit {
    background-color: #28a745;
    color: #fff;
    padding: 10px 20px;
    border: none;
    cursor: pointer;
}

.wpforms-submit:hover {
    background-color: #218838;
}
Using Add-ons
Enhance your forms with WPForms add-ons, such as:
- Stripe/PayPal Add-on: For payment forms.
- Mailchimp Add-on: For email marketing integration.
- Conditional Logic Add-on: To create dynamic forms that adapt to user input.
Optimizing Your Forms
Enable Spam Protection
- Go to the WPForms settings page.
- Enable CAPTCHA or reCAPTCHA to block spam submissions.
Connect with Google Sheets Connector
Store form entries in Google Sheets using the GSheetConnector plugin:
- Install and activate GSheetConnector.
- Map your WPForms fields to Google Sheets.
- Test the integration to ensure smooth data transfer.
WPForms Google Sheet Connector: Free vs. Pro Version – Pros & Cons
WPForms Google Sheet Connector Free Version Features – (Download Now)
- Google Sheets API (Up-to date)
- One Click Authentication
- Quick Configuration
- Real-time Form Entries
- Manually Adding Sheet & Tab Name
- Multi Language Support
- Multi Site Support
- Automatic Updates
- Quick Configuration
- Latest WordPress & PHP Support
- Comprehensive Documentation
WPForms Google Sheet Connector Pro Version Features – (Buy Now)
- Google Sheets API (Up-to date)
- One Click Authentication
- Quick Configuration
- Click & Fetch Sheet Automated
- Real-time Form Entries
- Creating New Sheet Option
- Manually Adding Sheet & Tab Name
- Automated Sheet & Tab Name
- Multiple Forms to Sheets
- Multi Sheets using Multi-Feeds
- Send Missed Entries to GSheet
- Custom / Smart Tags
- Custom Ordering
- Enable/Disable Sheet Headers
- Freeze Header / Color Option
- Sync Setting
- Role Management
- Multiple Forms to Sheets
- Multi Language Support
- Multi Site Support
- Automatic Updates
- Quick Configuration
- Latest WordPress & PHP Support
- Excellent Priority Customer Support
- Comprehensive Documentation
Why WPForms is Essential for Your Website
- Build Trust: A contact form allows visitors to reach out to you, fostering trust and engagement.
- Improve Communication: It’s an effective way to manage communication from potential customers or clients.
- Track Data: With the Google Sheets integration, you can keep track of every submission and monitor trends.
Final Thoughts
WPForms is an excellent tool for creating professional and user-friendly forms in WordPress. Whether you’re a beginner or an experienced developer, its features cater to all skill levels. By following this guide, you can easily set up, customize, and optimize WPForms for your website.
Looking for advanced functionality? Pair WPForms with plugins like GSheetConnector to streamline your workflows and manage form entries efficiently.
Need Help?
If you have questions or need assistance with WPForms GSheetConnector, click on Support Now for expert guidance!
Share This Story, Choose Your Platform!
 How to Connect Contact Form 7 with Google Sheets for Automatic Export
 How to Set Up Gravity Forms in WordPress: A Beginner’s Guide