Divi by Elegant themes has been our go-to WordPress theme for years. Whether we are working on internal projects or building websites for clients, Divi consistently offers a balance of design flexibility, speed, and usability that is difficult to match. One feature we rely on heavily across almost every Divi-powered website is its built-in contact form module.
Divi forms are simple to create, easy to customize, and tightly integrated with the theme itself. For a long time, that was enough for us. However, as projects grew and client requirements became more complex, we realized that what happens after a form is submitted is just as important as how the form looks on the page.
This article explains how we manage Divi contact form submissions today, why we chose not to replace Divi forms, and how we extended our existing workflow to handle real-world lead management more effectively.
Why Contact Forms Are Central to Every Divi Website
On most Divi websites, contact forms are more than just a design element. They are the primary entry point for communication.
Across our Divi projects, contact forms are commonly used for sales inquiries, support requests, client onboarding, partnership opportunities, and general business communication. Each submission represents a real person, a real question, or a potential opportunity.
As long as submission volume is low, email notifications may be sufficient. However, as soon as multiple team members become involved or submission volume increases, managing form data through email alone quickly becomes inefficient.
Creating Contact Forms in Divi and Why We Keep It Native
One of the main reasons we continue to use Divi forms is simplicity. Divi removes unnecessary friction from the form creation process and allows everything to be handled within the theme itself.
We deliberately avoid replacing Divi forms with external form builders unless there is a strong reason to do so. Instead, our approach has always been to extend Divi’s native functionality without disrupting the existing design or workflow.
How to Create a Contact Form in Divi (Step by Step)
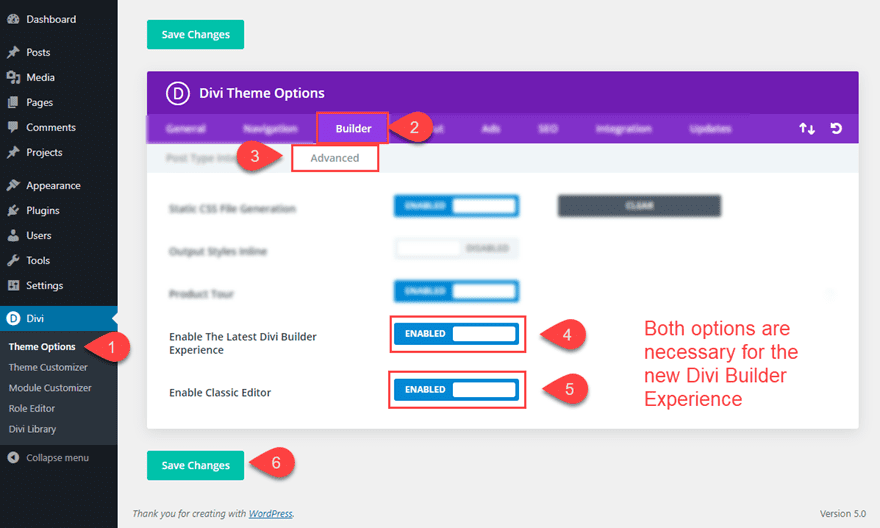
Step 1: Enable the Divi Builder
Open the page where you want to add the contact form and enable the Divi Visual Builder.
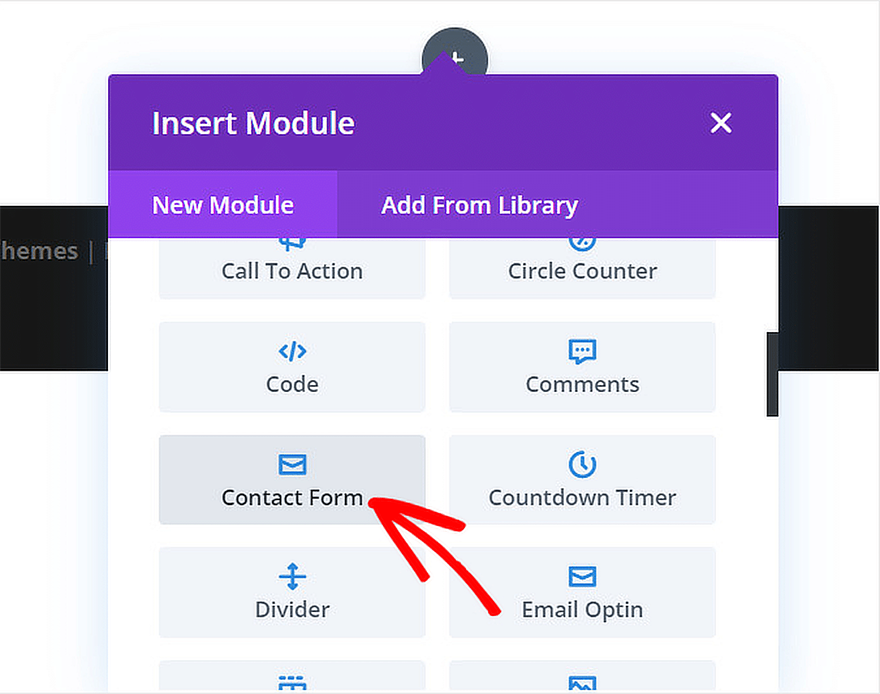
Step 2: Add the Contact Form Module
Inside the Divi Builder, click the plus icon to add a new module. Search for Contact Form and select the Contact Form module.
Step 3: Configure Form Fields
Divi provides default fields such as Name, Email, and Message. You can add additional fields, change labels, mark fields as required, or use different field types like dropdowns or checkboxes.

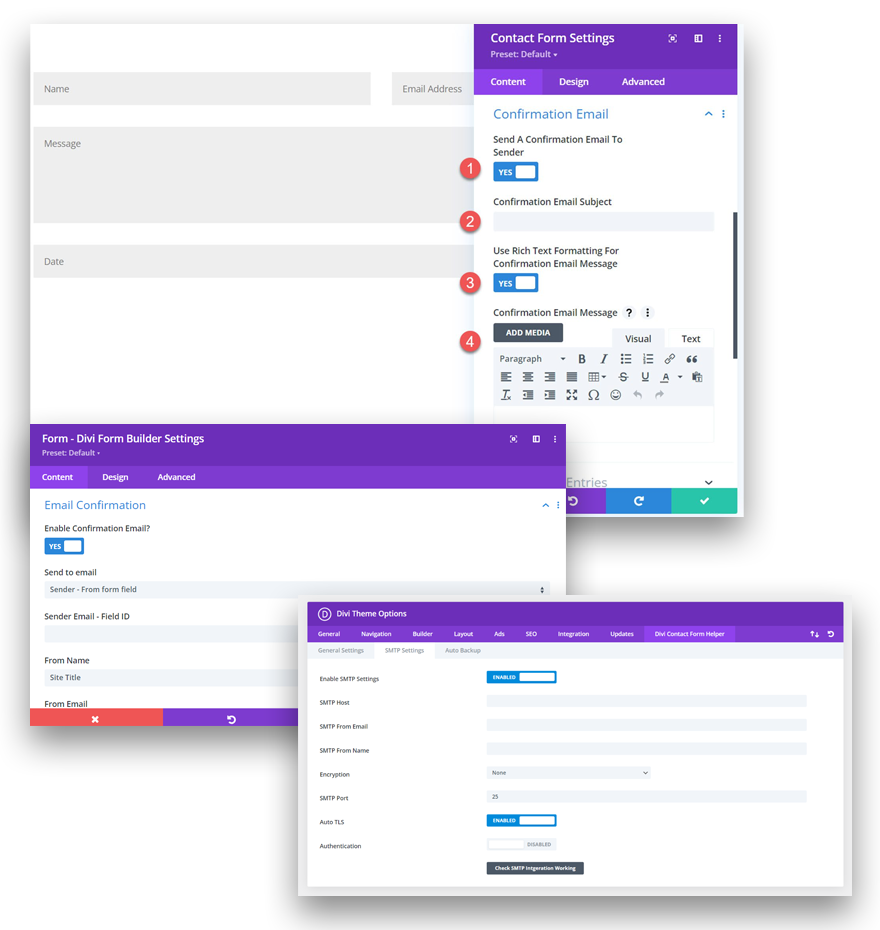
Step 4: Configure Email Settings
Set the email address where submissions should be sent, customize the subject line, and configure the success message displayed after submission.
Step 5: Style the Form Using Divi Design Options
Divi allows full visual control over form styling, including fonts, spacing, colors, and responsive behavior. This ensures the form matches the overall site design without custom CSS.
Step 6: Save and Test the Form
Save the module, publish or update the page, and submit a test entry to confirm the form is working correctly.
For additional field-level customization and advanced configuration options, Divi’s official documentation provides a detailed reference. You can review it here:
Divi Contact Form Documentation
The Real Challenge: Managing Submissions After They Are Sent
Once forms are live, the next challenge is managing the data they generate.
Over time, we encountered common issues such as inbox overload, missed submissions, limited access for team members, and no centralized way to review or organize entries. Email notifications alone did not scale well, especially when working with clients or distributed teams.
The limitation was not Divi forms themselves, but the lack of a shared, structured backend for submission data.
Why We Needed a Shared Backend Instead of Another Form Plugin
Rather than switching form builders, we focused on improving how submissions were stored and accessed.
We needed a solution that allowed multiple people to view submissions, filter and sort data, and maintain a long-term record of entries. Google Sheets naturally fit this requirement. Teams already use it daily, data can be shared instantly, and submissions can be organized without technical overhead.
The goal was to keep using Divi forms exactly as they are while improving how the data is handled after submission.
How to Connect Divi Forms to Google Sheets
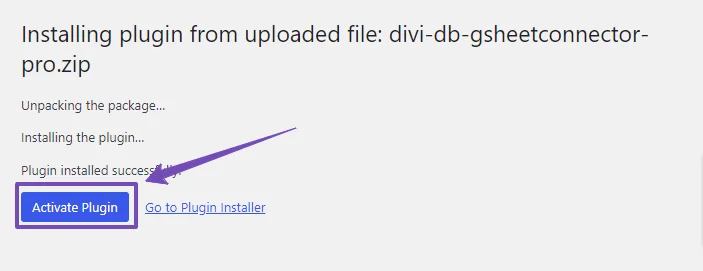
Step 1: Install and Activate the Divi Forms Google Sheets Connector
From the WordPress dashboard, go to Plugins, click Add New, search for Divi Forms Google Sheets Connector, then install and activate the plugin.
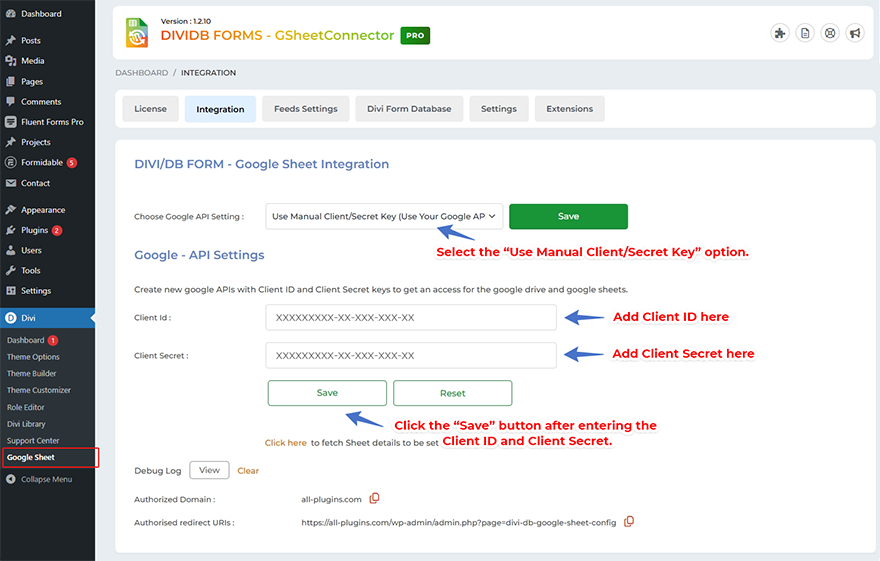
Step 2: Authenticate Your Google Account
After activation, navigate to the plugin settings and click the option to authenticate with Google. Select the Google account where form submissions should be stored and grant the required permissions.

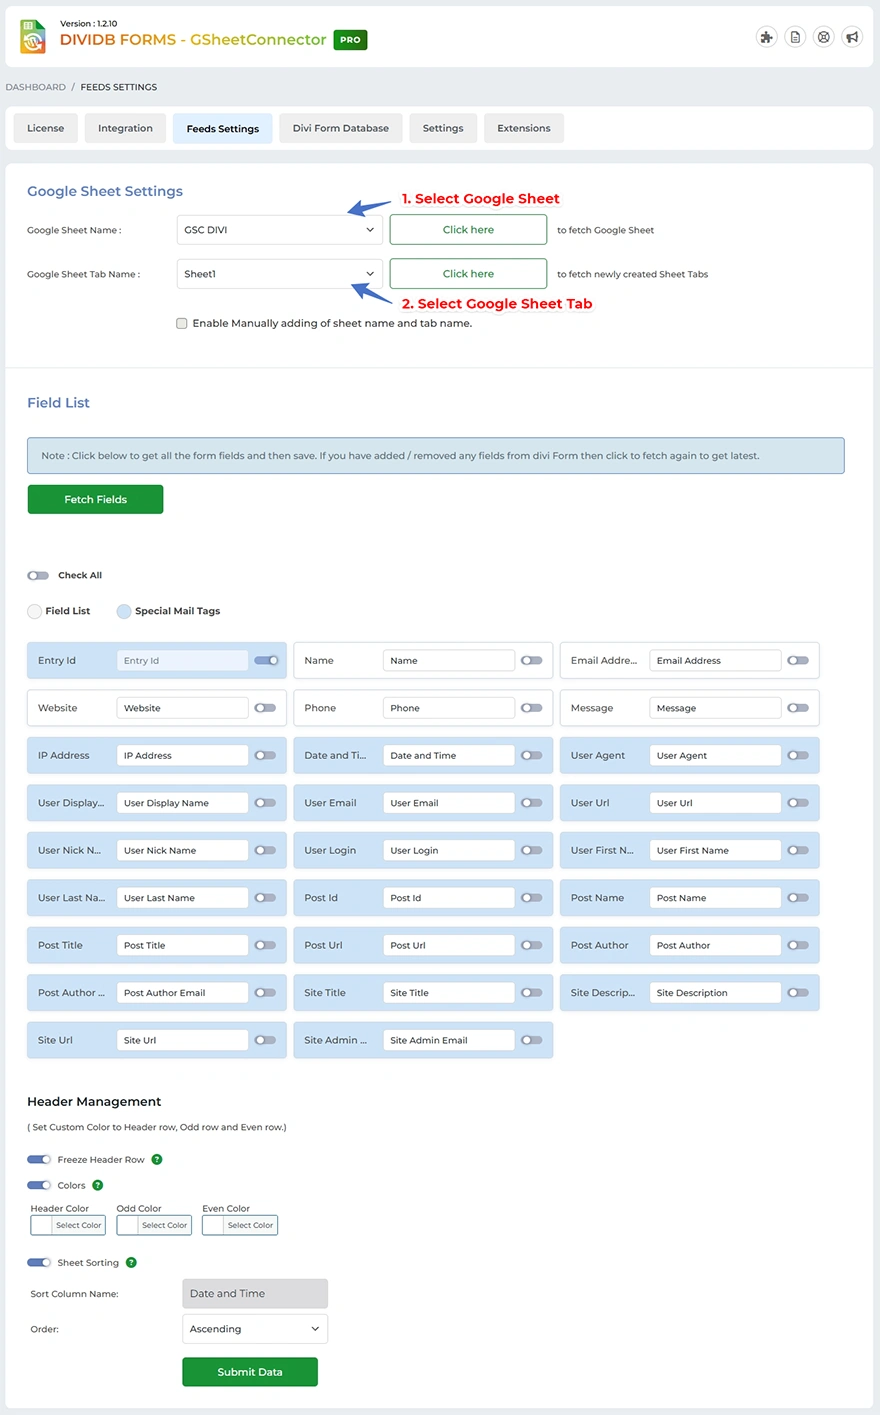
Step 3: Select or Create a Google Sheet
Once authenticated, you can select an existing Google Sheet or create a new one directly from the plugin interface. Each form submission will be added as a new row with columns mapped to form fields.
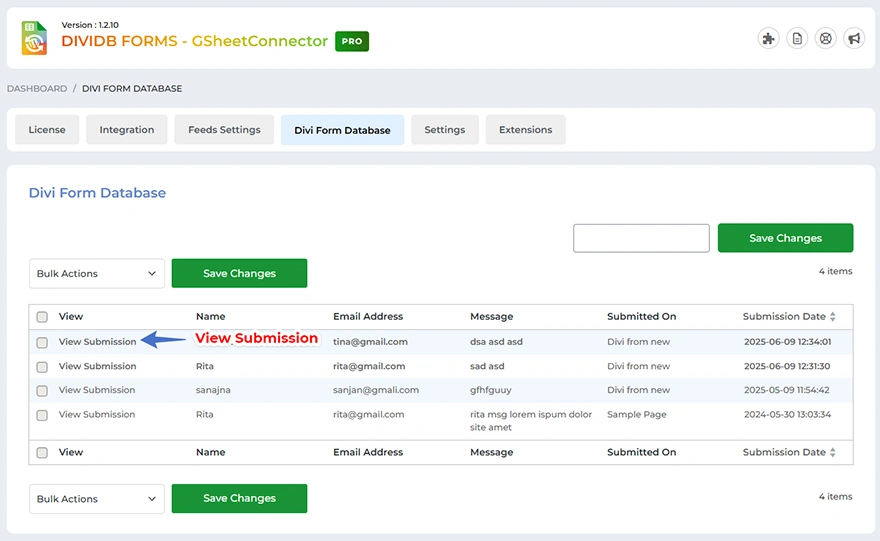
Step 4: Enable the Divi Forms Database
The plugin also allows you to store submissions locally inside WordPress. Enable the Divi Forms Database option from the settings to maintain an on-site backup of all form entries.
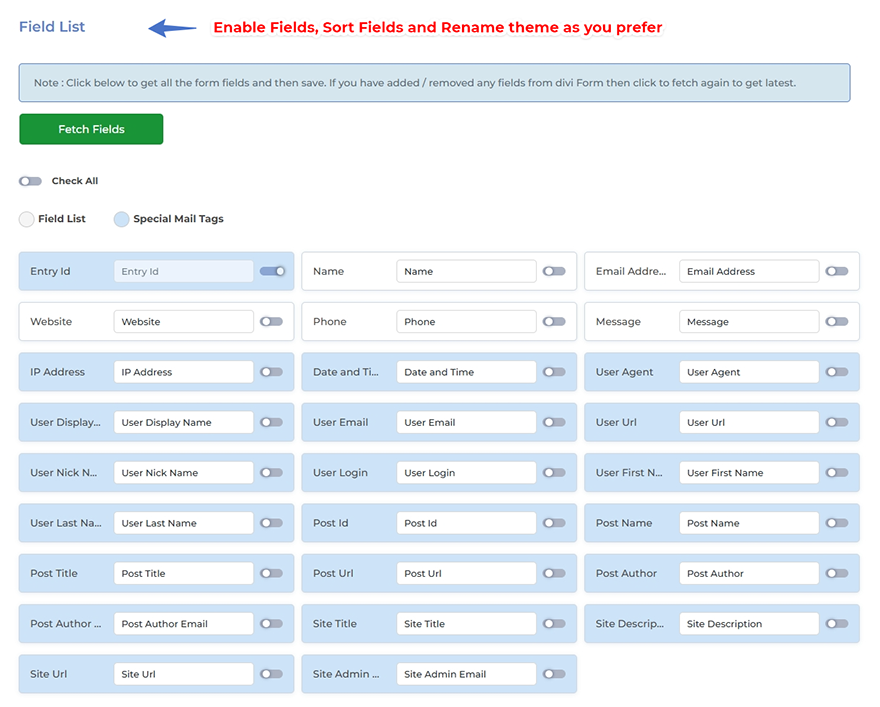
Step 5: Map Form Fields and Save Settings
Open your Divi form settings, enable Google Sheets integration, confirm field mapping, and save the configuration.
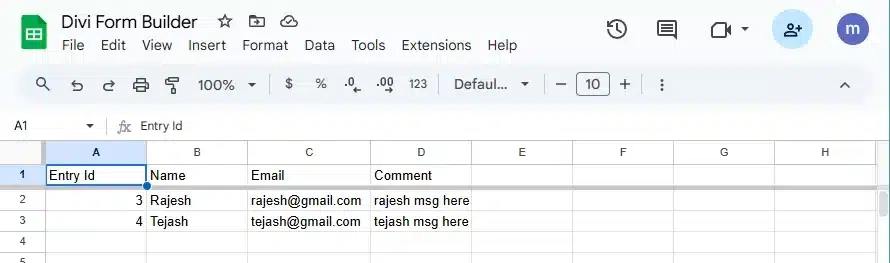
Step 6: Test the Integration
Submit a test entry through the form and confirm that the data appears correctly in the connected Google Sheet and in the local database if enabled.
Why This Setup Works Well With Divi
This approach allows Divi forms to remain unchanged while adding a reliable data management layer. Submissions are stored in real time, can be shared easily, and remain accessible long after emails are sent.
We also appreciate having both cloud-based storage in Google Sheets and an optional local backup inside WordPress. It creates redundancy without adding complexity.
To learn more about the integration, you can explore the official documentation here:
Divi Forms Google Sheets Connector Documentation
An Agency Perspective on Scaling Divi Projects
For agencies and freelancers managing multiple Divi websites, consistency and predictability matter. Repeating the same form and data-handling setup across client sites saves time and reduces errors.
This is also why many agencies opt for Divi’s unlimited lifetime plan. It removes per-site limitations and offers long-term value when building and maintaining multiple projects.
When combined with a structured way to manage form submissions, it creates a workflow that scales cleanly as client work grows.
Final Thoughts
Divi contact forms do not need to be replaced to support real-world lead management. In our experience, extending Divi with a proper data storage layer is enough.
By keeping Divi forms native and sending submissions to Google Sheets, we were able to improve visibility, collaboration, and follow-up without changing how forms are built or styled.
If you are already using Divi forms and finding email-only notifications limiting, this workflow may integrate naturally into your existing setup.
Share This Story, Choose Your Platform!
 WooCommerce Statistics 2025: Usage, Market Share & What to Expect in 2026
 How to Hide Contact Form 7 After Submission and Show a Custom Success Message in WordPress