Please note – we’ll focus on the steps to manually update CF7 Google Sheet Connector PRO. That being said, you can follow the same steps for the any addon plugin version of GSheetConnector as well as any plugin for that matter.
Updating GSheetConnector manually is extremely easy – let’s take a look at the manual update process step by step:
Lets say, you are using the CF7 Google Sheet Connector version 2.3.9 and updates are not showing, in this case you can follow this steps.
Current Published Version: 2.3.15
Refer Changelog of CF7 Google Sheet Connector PRO
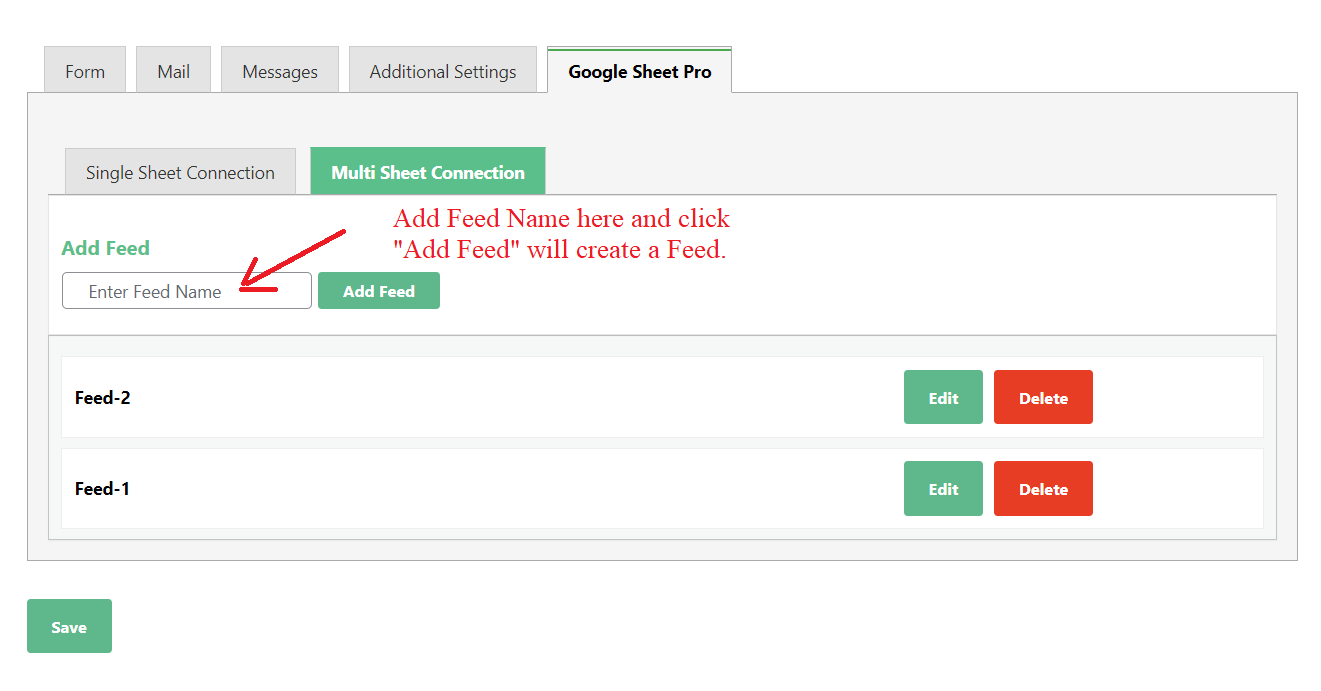
In version 2.3.13, we have added Multisheets while creating new feed along with Conditional Settings, Multisheet Connection enables the linkage of a single Contact Form to multiple Google Sheets or individual tabs within those sheets, all within the same connected Google Account. This feature allows you to selectively save specific field data from the Contact Form into different spreadsheets or tabs, providing a flexible and organized way to manage and store your data. Refer the screenshots below,
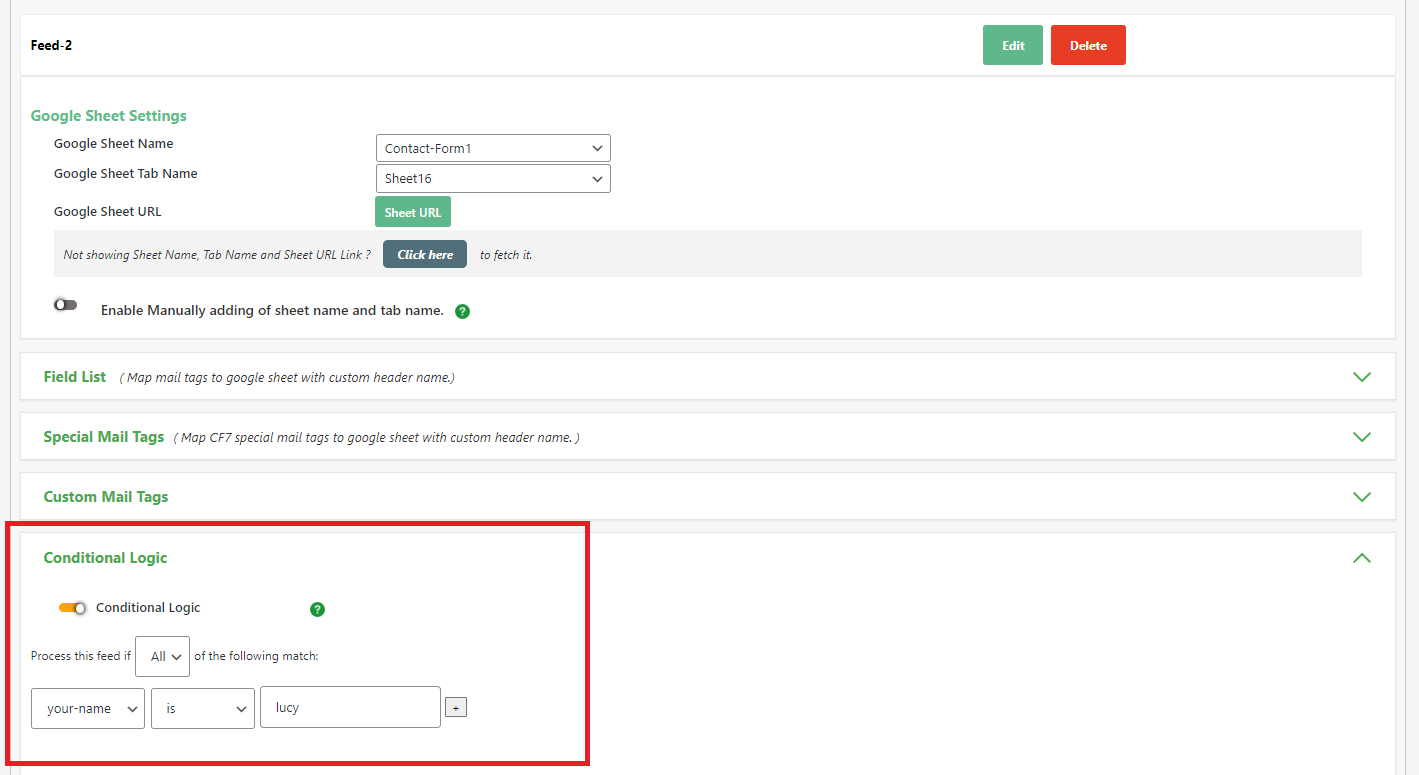
For both Single and Multisheet Connections, you have the ability to add conditional logic to your Contact Form. This means you can set up specific conditions that determine how and where the data from the form is saved in the connected Google Sheets. Refer the screenshot below,
So any of you who are using version 2.3.9 version and updates are not showing then it would need a manual version update and below are the steps to update it.
1. To download the CF7 Google Sheet Connector PRO latest version, log in to your account using the credentials you used for the purchase. Once logged in, navigate to “My Account” then the “Purchase History” tab. You will find the “View Details and Downloads” option, which will allow you to access and download the plugin and show the license keys.

In this section, you can view the details of your purchase, including the associated license keys. Additionally, you’ll find the “Download Plugin” option, which allows you to download the plugin files for installation on your website.

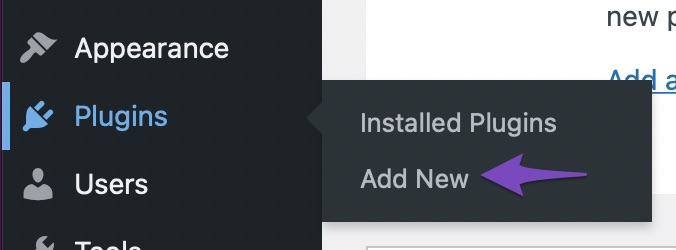
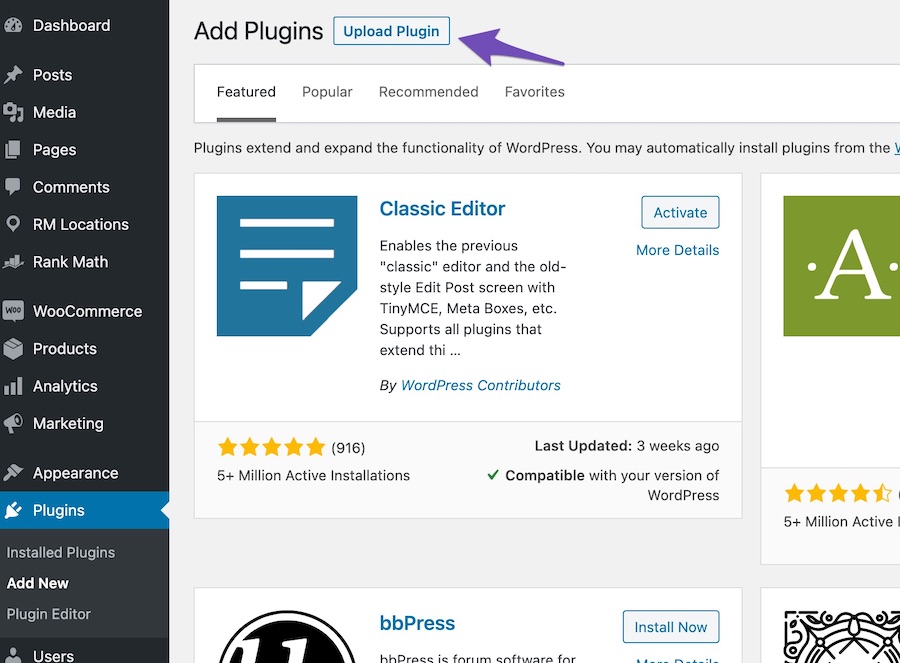
Once you have downloaded the CF7 Google Sheet Connector PRO files from your account, then go to Plugins → Add New.
Here is a GIF to help you further:
[add gif if possible]Then click on Upload Plugin in your dashboard.
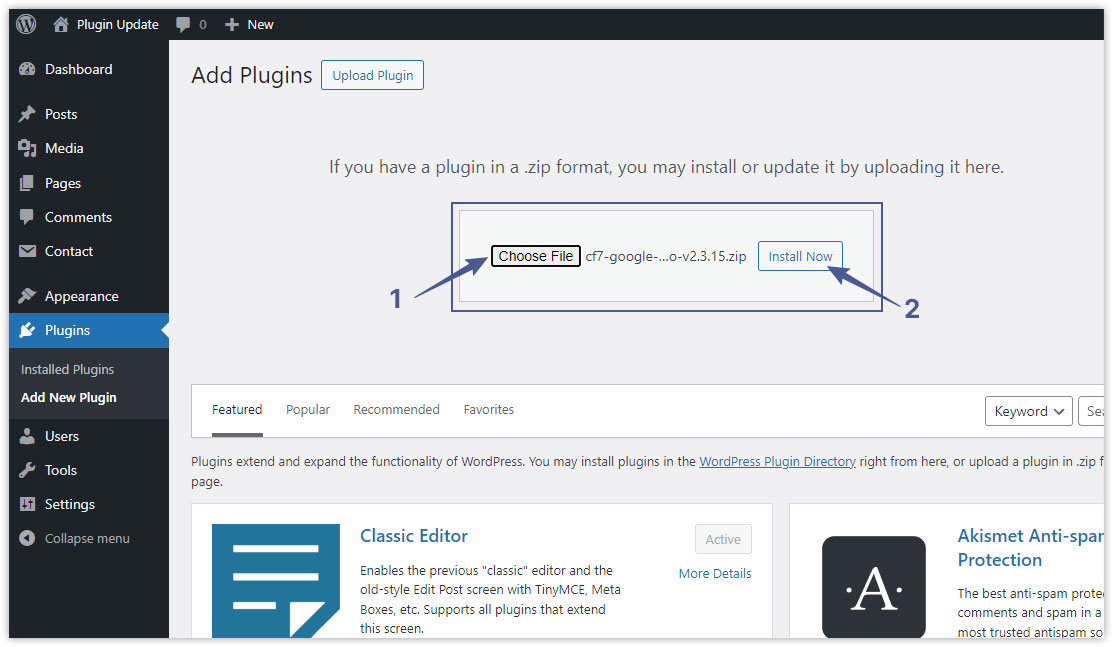
Once you choose the file from the File Browser, then click on Install Now.
Once you click on Install Now, you will see the screen as shown below.
Click on Replace current with uploaded.
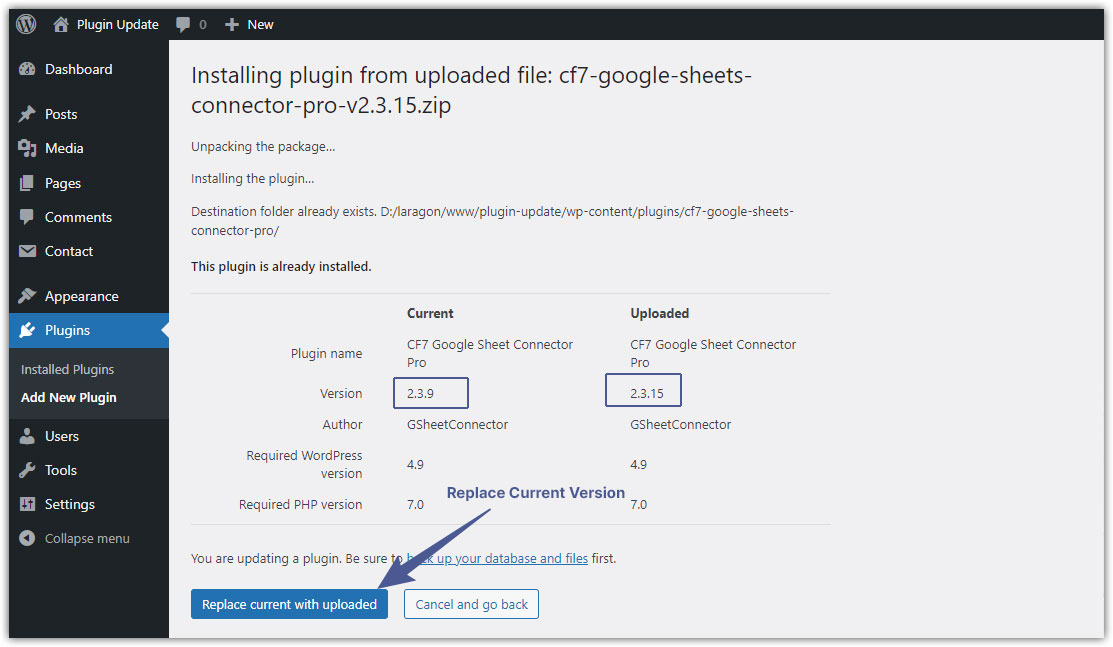
Note: The above option only shows if you have WordPress 5.5 or above. If you are using an older WordPress version, you must delete CF7 Google Sheet Connector and upload an updated version. Deleting the plugin will not remove any data as the data is stored in the DB, and installing an updated version will bring back the data. Either you can manage to upload the plugin from file manager or a cPanel
Steps to upload through File Manager
Unzip the file and get the plugin package. You will see a folder called “cf7-google-sheets-connector-pro”.
Login into your WordPress site and “Deactivate” CF7 Google Sheet Connector PRO. Do not worry, you will not lose any data.
Using an FTP client software or CPanel, connect to your server and go to the /wp-content/plugins folder.
Delete the “cf7-google-sheets-connector-pro” folder from here. Do not worry, you will not lose any data.
Copy over the unzipped folder here. You should see the folder called “cf7-google-sheets-connector-pro”.
Login into your WordPress site and activate the plugin. As soon as you activate the plugin, you will be upgraded to the latest CF7 Google Sheet Connector PRO version.
In case you need any assistance, open a support ticket or drop us an email at helpdesk@www.gsheetconnector.com
Share This Story, Choose Your Platform!
 Metform Google Sheet Connector
 Cyber Month 2024 Sale – Up to 20% Off Multisite & Lifetime Licenses!