
Do you want to enhance your WordPress website’s design with stunning typography?
Google Fonts make it easy to add visually appealing web fonts to your WordPress theme. By integrating these fonts, you can improve your website’s typography, user experience, and overall aesthetics, giving it a more professional and polished look.
In this article, we’ll guide you through the proper steps to add Google Web Fonts to your WordPress theme effortlessly.
How to Find the Perfect Google Fonts for Your WordPress Theme
Choosing the right font is key to creating a cohesive and visually appealing website. Start by visiting the Google Fonts website, where you can browse through a vast library of fonts. Explore the collection to find the fonts that complement your website’s design and align with its overall theme.

When you find a web safe font that you like, go ahead and click on it to view different styles available.
You can select the styles you would like to use on your website.

Next, click on the ‘View Selected Families’ button, which will open a sidebar.
From here, you will see the usage instructions under the section ‘Use on the web’.

You will see that there are two different tabs for adding the font to your site
The first is the Link method, which is the recommended standard way of adding web fonts.
The second tab uses the @import CSS method that allows you to load the fonts via your CSS stylesheet.
We will show you how to use each of these methods and what are there pros and cons.
Method 1: Adding Google Fonts to Your WordPress Theme Using a Plugin
The easiest way to add Google Fonts to your WordPress theme is by using a plugin. This method is beginner-friendly and requires no coding.
Start by installing and activating the Fonts Plugin.
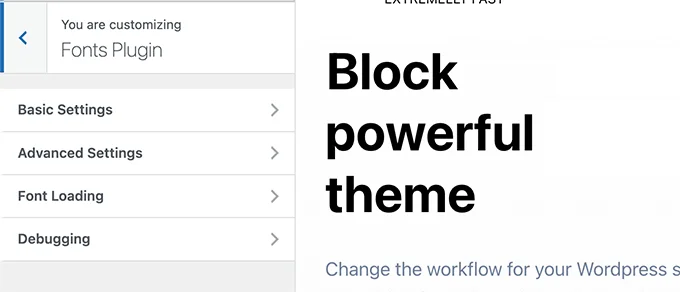
Once the plugin is activated, navigate to Appearance » Customize in your WordPress dashboard to open the Theme Customizer. You’ll notice a new Fonts Plugin tab, where you can select and apply your desired Google Fonts to your theme.

Clicking on it will show you plugin options.
You can choose to use Google Fonts for different areas of your website.
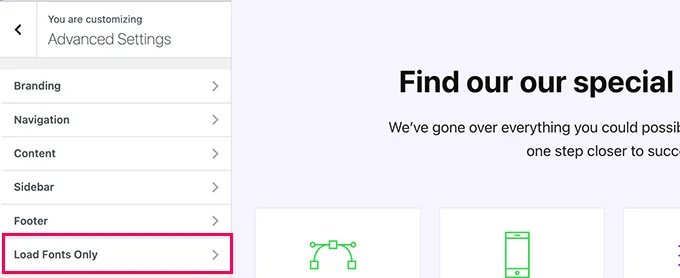
Alternately, you can also just choose to load a font for your WordPress theme.
Simply switch to Advanced Settings » Load Fonts Only tab.
From here you can choose Google Fonts that you want to load for your WordPress theme.
Simply type in the font name and then select it.
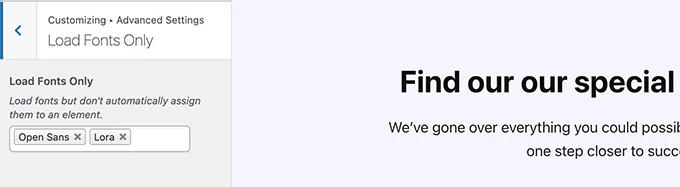
Once you are finished, don’t forget to click on the Publish button to save your changes.
Now, if you used plugin’s advanced features to assign fonts for different areas of your website, then those will work automatically.
On the other hand, if you opted to load fonts only, then you will need to add custom CSS rules for them. For instance, here is how you would load a font for the paragraph element throughout your website.
p {
font-family: 'Open Sans', sans-serif;
}
Method 2: Adding Google Web Fonts to Your Theme’s Header
Another straightforward way to integrate Google Fonts into your WordPress theme is by adding them directly to the theme’s header file.
To do this, open the header.php file of your WordPress theme or child theme. Then, copy the Google Fonts link code from the Google Fonts website and paste it just above your theme’s stylesheet link.
Here’s an example of how it should look:
<link rel="preconnect" href="https://fonts.googleapis.com">
<link rel="preconnect" href="https://fonts.gstatic.com" crossorigin>
<link href="https://fonts.googleapis.com/css2?family=Open+Sans:wght@400;800&display=swap" rel="stylesheet">
<link rel="stylesheet" type="text/css" href="YOUR THEME STYLESHEET" media="screen">
Basically the goal is to put the font request as early as possible. This allows user’s browser to download fonts before rendering the page.
Once you have done that, you can use the font in your theme’s CSS file:
h1 {
    font-family: 'Open Sans',  sans- serif;
}
This method gives you more control over font integration but requires basic familiarity with editing theme files.
Method 3: Adding Google Fonts to Your Theme’s Stylesheet
For this method, you’ll import the Google Fonts CSS directly into your WordPress theme’s main stylesheet.
To get started, open the style.css file located in your theme’s root folder. Then, copy the font code from the ‘@import’ tab on the Google Fonts website and paste it at the very top of your stylesheet.
Here’s an example of what the code might look like:
@import url('https://fonts.googleapis.com/css2?family=Open+Sans:wght@400;800&display=swap');
This is how it looked in our demo website’s style.css file.
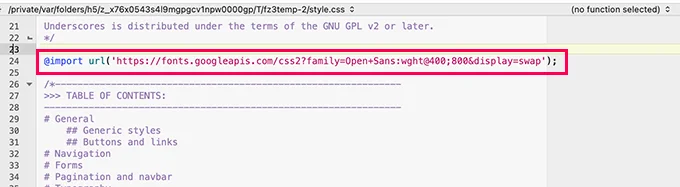
Important: Make sure that you add the @import line at the top of your CSS file.
Method 4: Properly Enqueue Google Fonts in WordPress
The earlier methods involve directly editing theme files, which works best if you’re using a child theme to preserve your changes. However, if you modify the main theme, these changes will be overwritten during a theme update.
To prevent this, a better approach is to programmatically enqueue Google Fonts in WordPress. This ensures the fonts are loaded automatically without modifying the theme files directly.
You can achieve this by adding a custom code snippet to either a site-specific plugin or a custom code plugin. For detailed steps, check out our tutorial on how to add custom code in WordPress.
Here’s the code snippet to enqueue Google Fonts:
function wpb_add_google_fonts() {

wp_enqueue_style( 'wpb-google-fonts', 'https://fonts.googleapis.com/css?family=Open+Sans:300italic,400italic,700italic,400,700,300', false );
}

add_action( 'wp_enqueue_scripts', 'wpb_add_google_fonts' );
Note: Don’t forget to replace the URL with the URL for Google fonts you want to add.
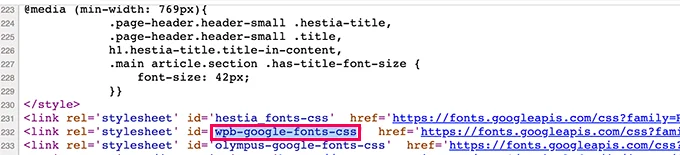
That’s all, WordPress will now use the Link method to automatically fetch Google Fonts you added.
You can confirm it by viewing your website’s source code, there you’ll see your Google fonts stylesheet added in the footer section of your website.


 CF7 Google Sheet Connector
 WPForms Google Sheet Connector
 Ninja Forms Google Sheet Connector
 Gravity Forms Google Sheet Connector
 Formidable Forms Google Sheet Connector
 Forminator Forms Google Sheet Connector
 Fluent Forms Google Sheet Connector
 JetFormBuilder Google Sheet Connector
 Elementor Forms Google Sheet Connector
 Avada Forms Google Sheet Connector
 Divi Forms Google Sheet Connector
 WooCommerce Google Sheet Connector
 Easy Digital Downloads Google Sheet Connector
 WordPress Google Sheet Connector