This guide makes it easy to install WPForms and the WPForms Google Sheet Connector Plugin.
Integration of WPForms with Google Sheet:
- Ensure that you have successfully integrated (Automatic Integration or Manual Integration) WPForms with Google Sheet Connector.
After successfully completing the integration with Google with preferred method and configuring the necessary permissions as described in the last article, proceed to your WPForms Google Sheet dashboard – Form Setting. From there, Select the specific Contact Form that you intend to Configure for use with Google Sheets. This will allow you to set up the desired form-to-Google Sheets connection according to your requirements.
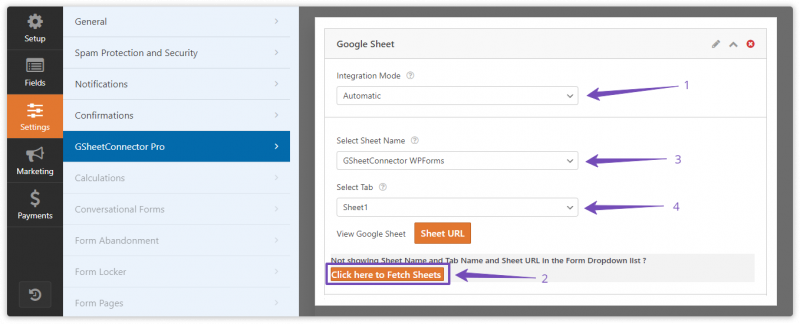
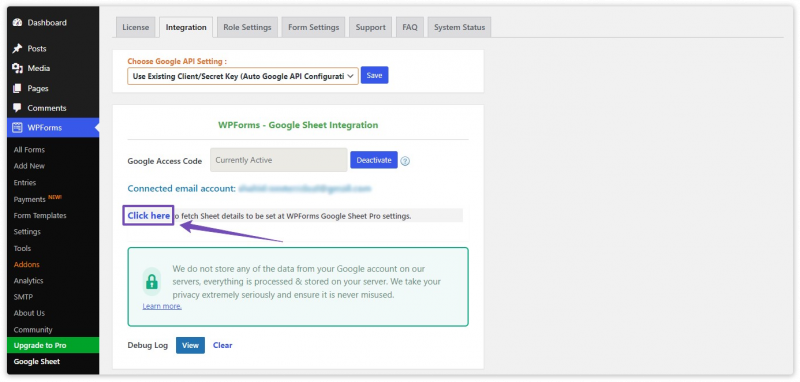
Fetch Sheets by clicking on “Click here to fetch it”.
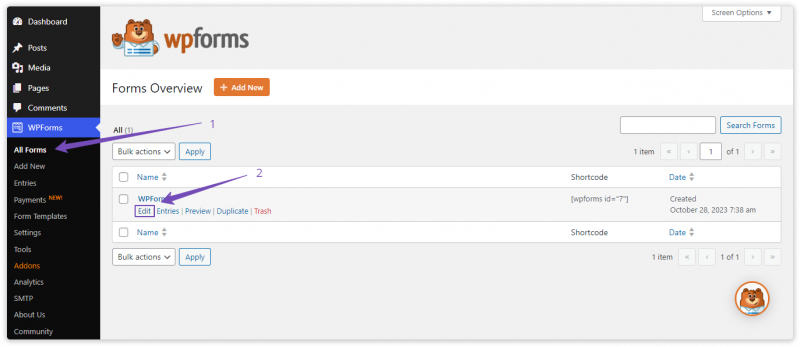
Go to Contact Form :
Go to WPForms dashboard – All Forms .
Edit Form that you want to configure with Google Sheet.
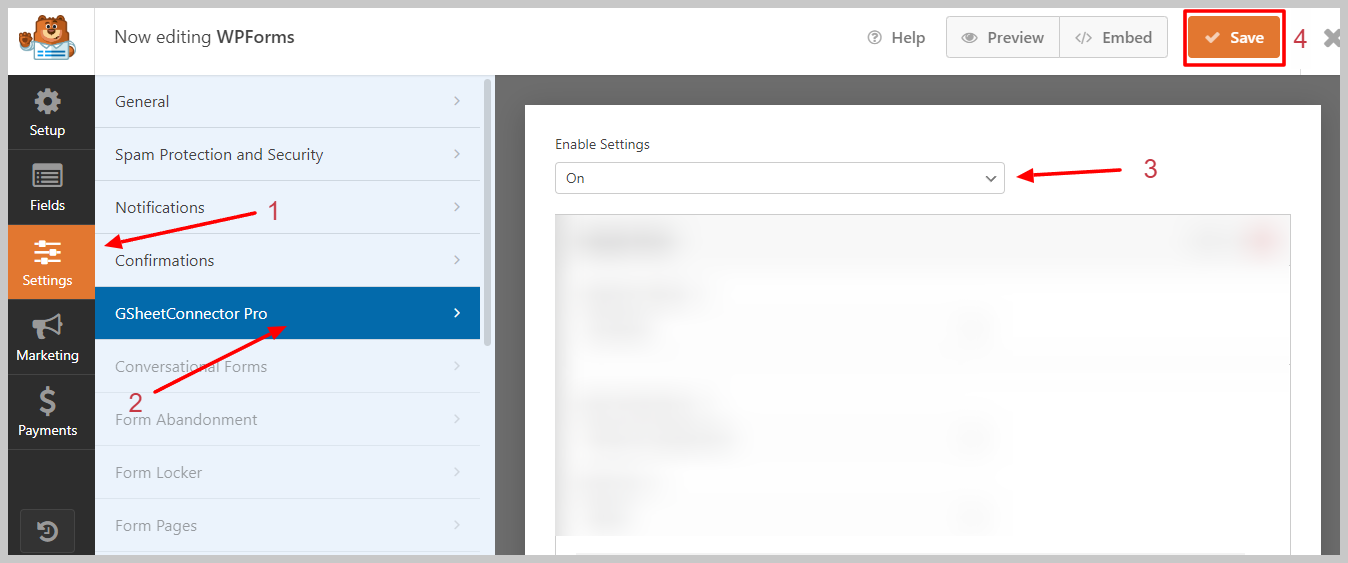
Feed Setting :
Now Go to Form Setting , In GSheetConnector Enable Setting : on.
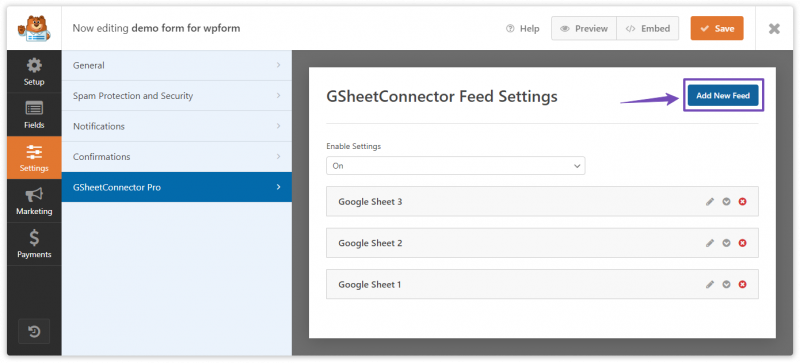
Multi Sheet Connection :
Add New Feed if you want to connect with more than one Google Sheet.
Feel free to add as many feeds as you need to meet your requirements.
Automatic adding Sheet Name & Tab Name :
Next, you will find both Manual and Automatic Selecting Methods for choosing the sheet you want to work with. If your sheets are not visible in the dropdown menu, you can click on the “Fetch Sheets” link below to retrieve them.
Select Google Sheet & Tab Name and scroll below to configure.
Note : Use Manual Method if You have too much Google Sheets.
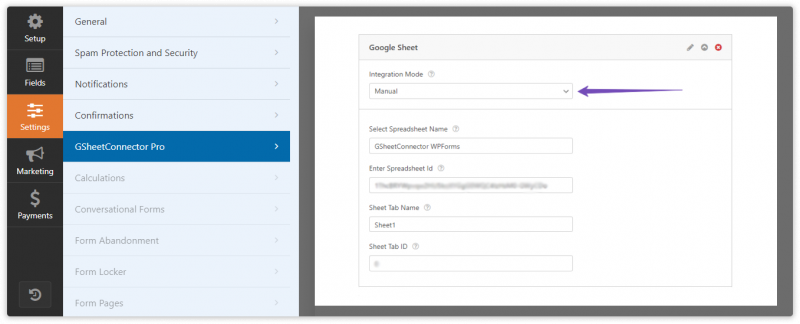
Manually adding Sheet Name & Tab Name :
In Manual Method You have to Manually Add Google Sheet Name , Google Sheet Id , Google Sheet Tab Name & Google Sheet Tab Id.
Add Manually Google Sheet Info like this.
Save & Submit Data.
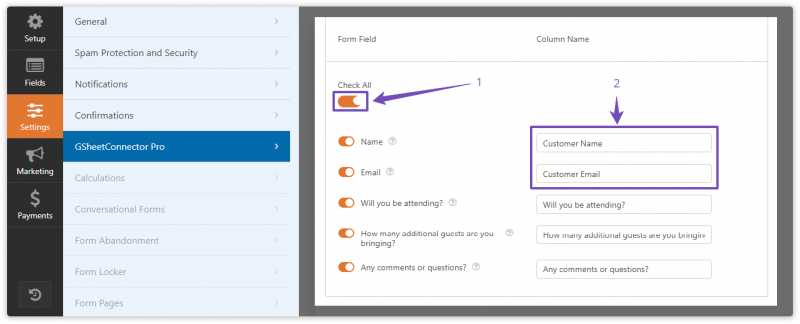
Form Field :
Enable the fields you wish to view in your Google Sheet by Enabling Fields or Check all to check all the fields.
You can also Rename it.
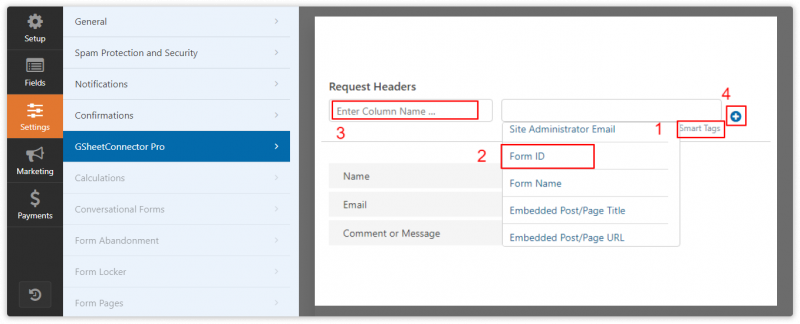
Request Headers :
Smart Tags are Default Fields like date , time etc.
Add smart tags like this :
- click on show smart tags
- select smart tag that you want to add.
- give name that you want to see in google sheet.
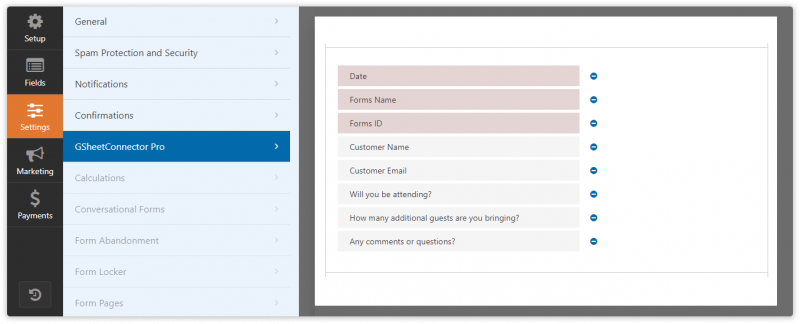
- you can add another smart tag like this.
Custom Ordering :
In Custom Order Setting you can sort fields for Google Sheet.
Freeze Header :
By enabling Freeze Header , Your header will be stick to the top in Google Sheet.
Background Colors :
By enabling Alternate Colors , you can get background colours
- Header Color : Header Color is for background color for Header.
-
Odd Color : Odd Color is for background color for odd rows.
-
Even Color : Even Color is for background color for even rows.
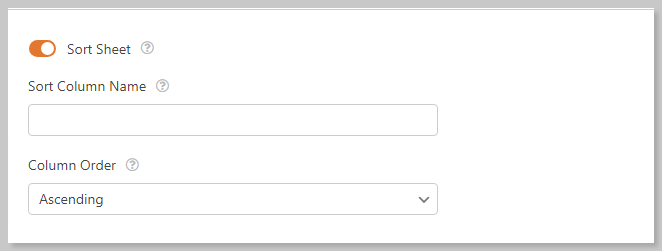
Sheet Sorting :
You can Sort Columns in Ascending & Descending order.
Conditional Logic :
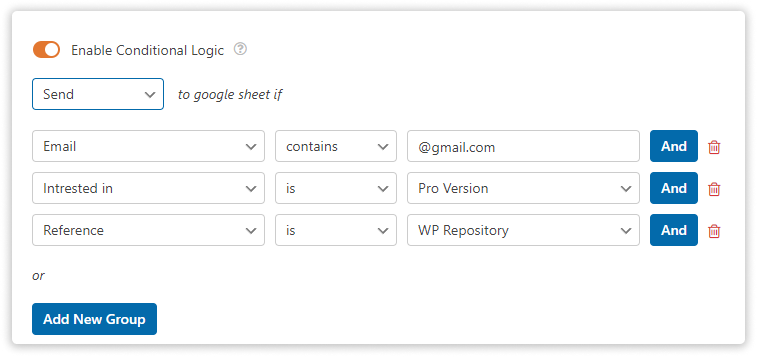
The most common use of conditional logic is to show or hide fields in google sheet depending on a user’s selection.
For example, we’ll ask users if they’d like tofill our demo form. However, we only want email address in “@gmail.com” , are they intrested in “Pro Version” & Refrence is “WP Repository”.
if you would like to know more about WPForms Conditional Logic.
Sync to Google Sheet :
Sync to Google Sheet to sync all your entries to google sheet.
Note : You Should have Any Primium Version of WPForms to SYNC Entries with Google Sheet.
