Learn how to save user-uploaded files directly to Google Drive with ease! If your form has an upload field and you need to save these files to a specific folder in your authenticated Google Drive account, follow these simple steps. Setting up Manual Authentication is required to enable this functionality.
Step 1: Set Up Manual Authentication
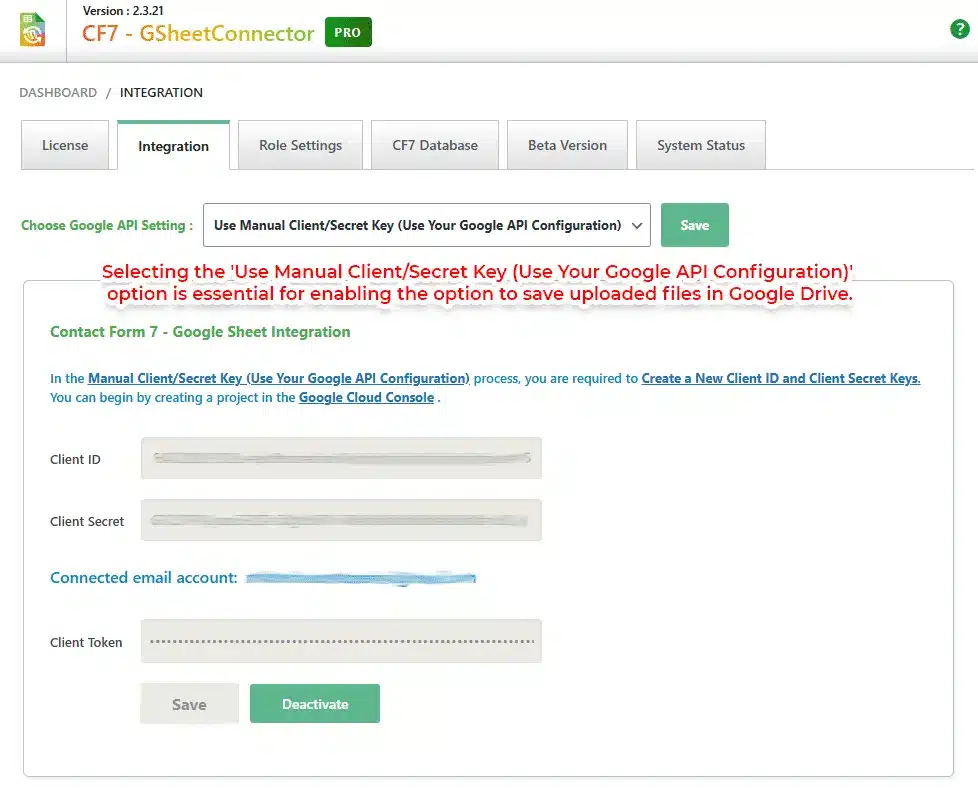
First, you must have to authenticate using the Manual Authentication Method as shown below.

On Integration tab Choose Google API Setting :Use Manual Client/Secret Key (Use Your Google API Configuration) and then click save.
Once authenticated, you can proceed to configure your form.
Step 2: Configure the Form’s Upload Field
Next, navigate to the form that includes the upload field where you’d like to save files to Google Drive. Beside the upload field, you’ll see options to choose the storage location—either on your local storage or Google Drive.
Select Google Drive and Choose a Folder
- Select Google Drive as your storage option.
- Once selected, you’ll see all folders in your connected Google Drive.
- Choose the specific folder where you want these files saved, and save the settings.

That’s it! Now, every file uploaded through this form field will automatically save to your specified Google Drive folder. A link to each uploaded file will also appear in the connected Google Sheet, allowing you to access these files directly.

For more information, check out our full guide on saving uploaded files to Google Drive with CF7 GSheetConnector. If you have any questions, please contact us at helpdesk@www.gsheetconnector.com.
 CF7 Google Sheet Connector
 WPForms Google Sheet Connector
 Ninja Forms Google Sheet Connector
 Gravity Forms Google Sheet Connector
 Formidable Forms Google Sheet Connector
 Forminator Forms Google Sheet Connector
 Fluent Forms Google Sheet Connector
 JetFormBuilder Google Sheet Connector
 Elementor Forms Google Sheet Connector
 Avada Forms Google Sheet Connector
 Divi Forms Google Sheet Connector
 WooCommerce Google Sheet Connector
 Easy Digital Downloads Google Sheet Connector
 WordPress Google Sheet Connector