This guide makes it easy to install Gravity Forms and the Gravity Forms Google Sheet Connector Plugin.
Integration of Contact Form with Google Sheet:
- Ensure that you have successfully integrated (Automatic Integration or Manual Integration) Gravity Form with Google Sheet Connector.
Edit Contact Form:
Go to the Gravity Form Dashboard:
- Log in to your WordPress admin dashboard.
- Navigate to the Gravity Form dashboard.
Edit the Form:
- Locate and edit the specific form that you want to integrate with Google Sheets.
- Locate and edit the specific form that you want to integrate with Google Sheets.

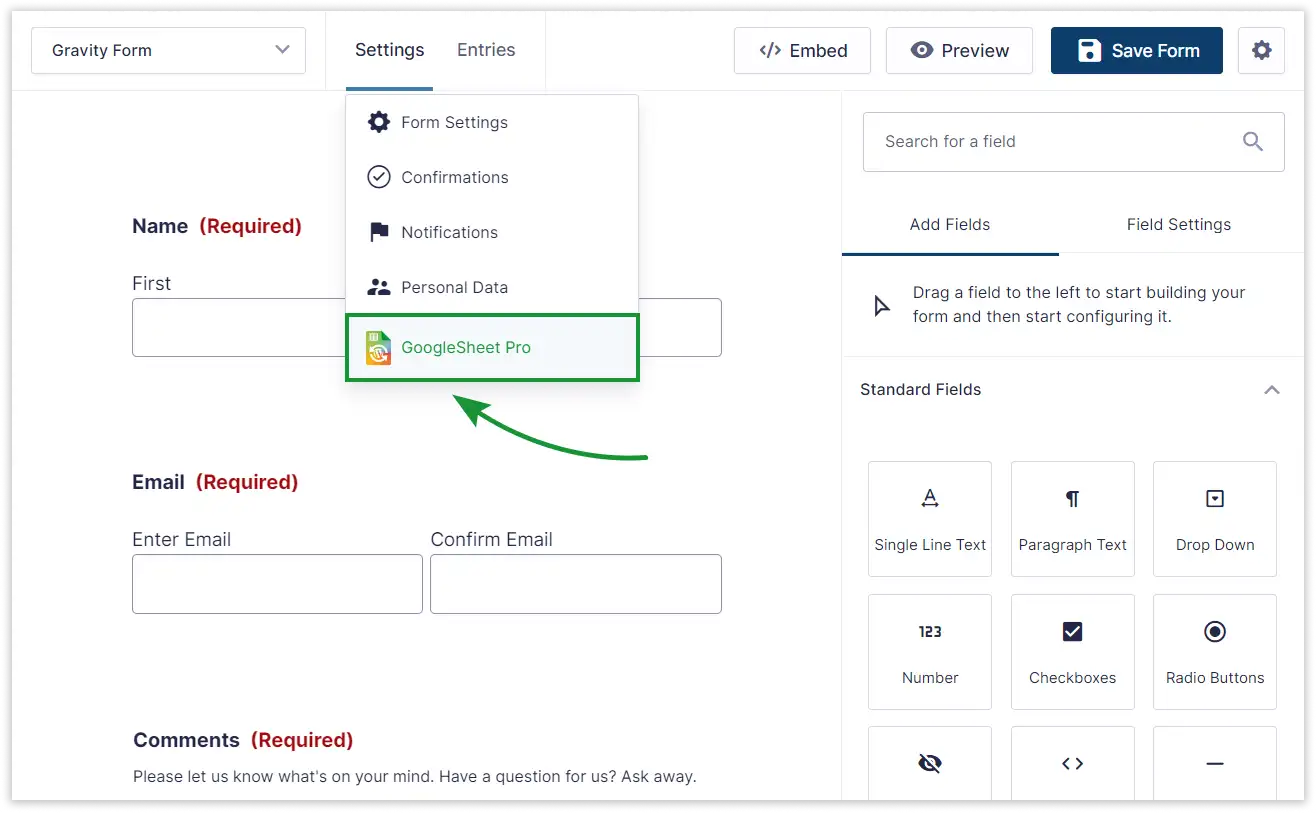
Edit Form – Setting – GoogleSheet Pro :
- In the form editor, go to the “Emails & Actions” tab.
- Click on “Add New Section” and add “Google Sheet Connector Pro.”
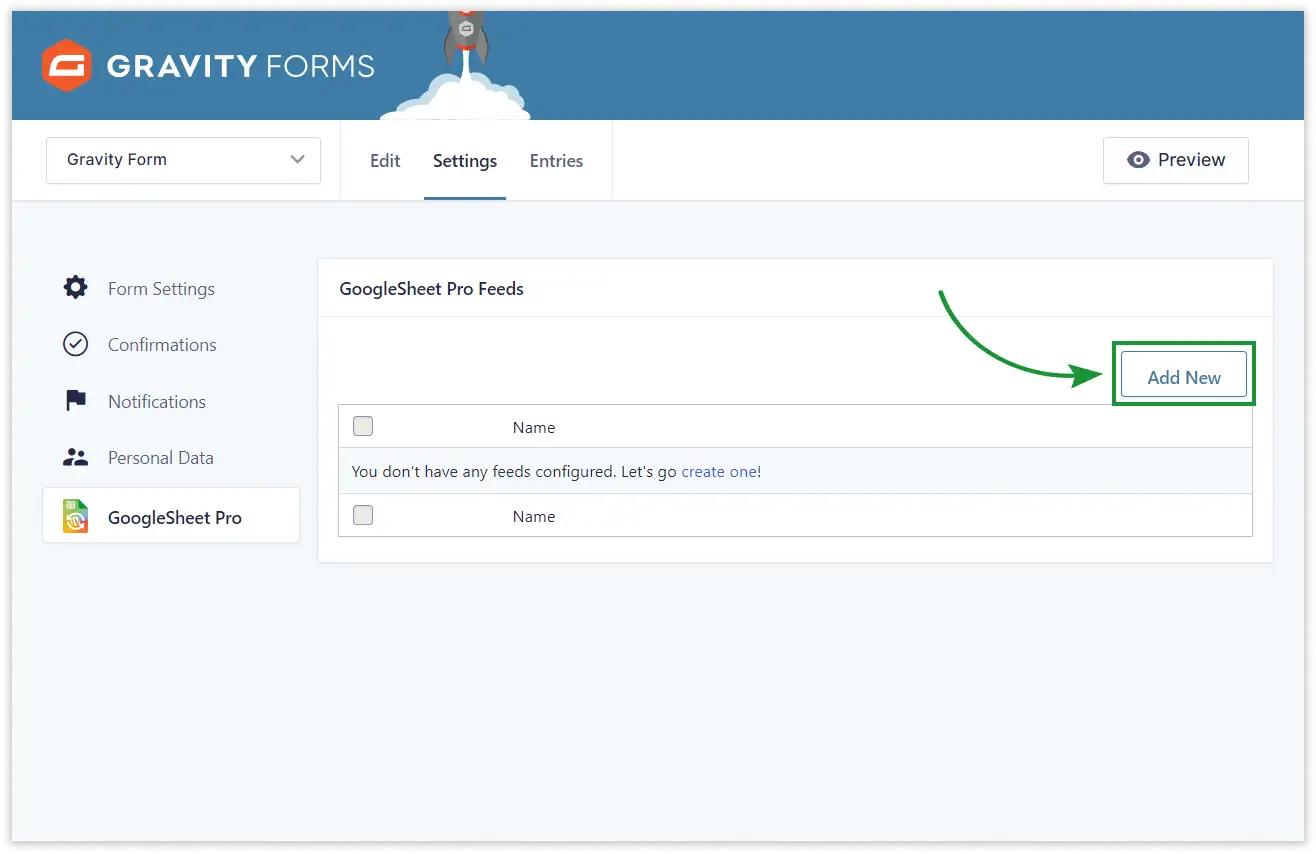
Add Feed and Name the Feed :
- Add feed by clicking on “Add New”.
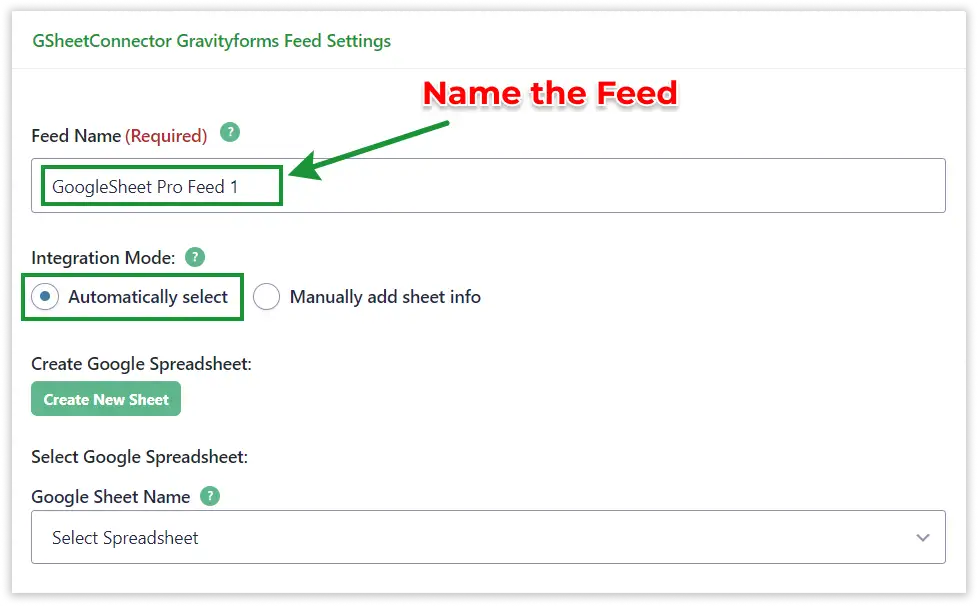
- Name the feed .
Automatic Select :
- Set the Integration Mode to “Automatic”.
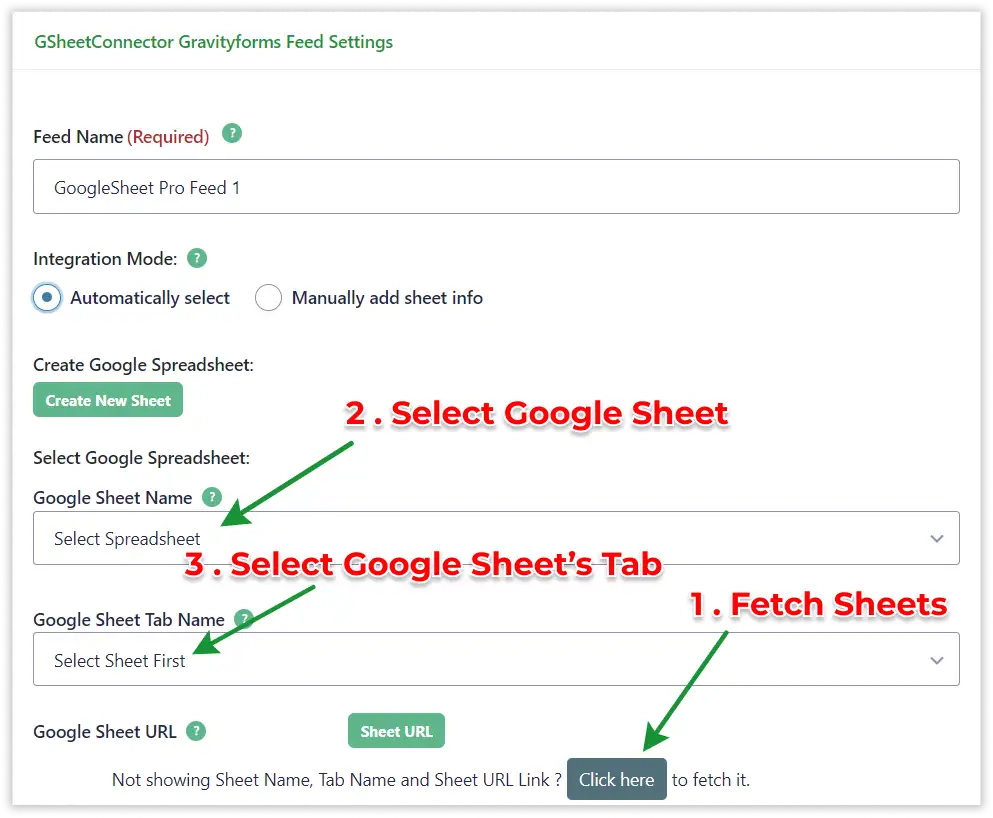
Click on Fetch Spreadsheet :
- Click on “Fetch Spreadsheet.”
- Select the Google Sheet Name.
- Choose the specific Tab Name.
- or Create New Google Sheet
Note : Use Manual Method if You have too much Google Sheets.
Manully Add Sheet Info :
- Add Google Sheet Name
- Add Google Sheet ID
- Add Google Sheet Tab Name
- Add Google Sheet Tab ID
Add Manually Google Sheet Info like this.

Field List :
- Add feeds based on your requirements.

Custom Tags :
- Using Custom, you can add custom tags like Entry Id, Entry Date, Form URL.

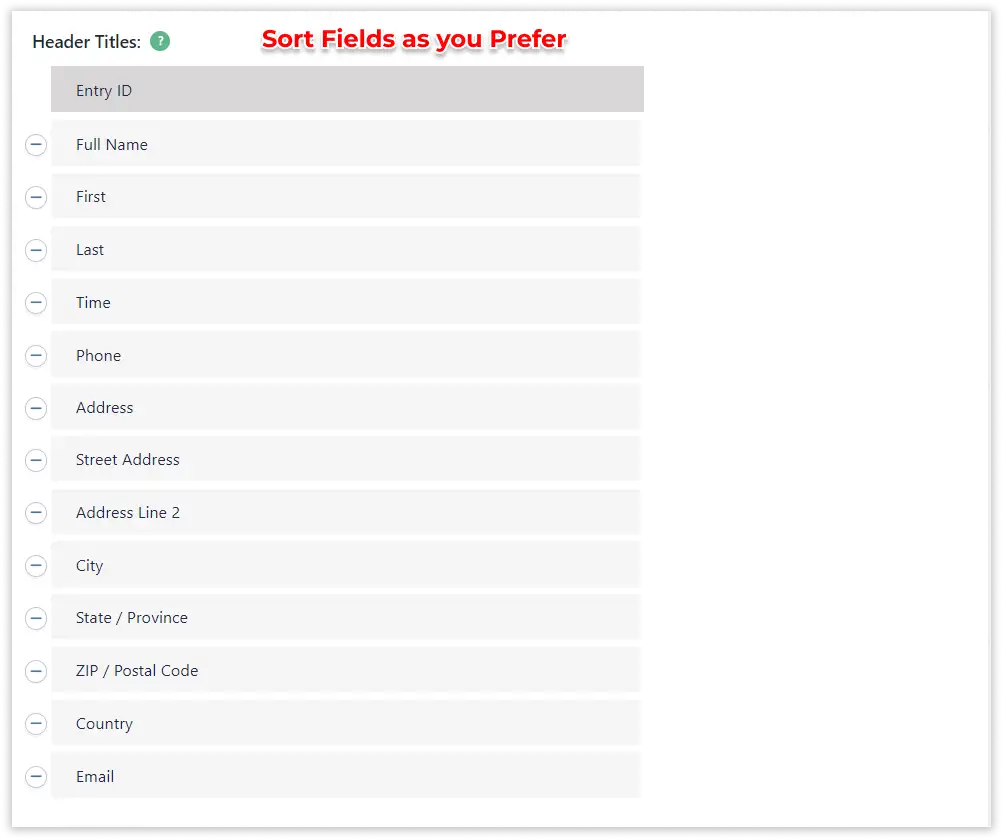
Header Sorting :
- You can sort headers according to your preference.
Freeze Header :
- Enable Freeze Header to make the header freeze on top.
Colors :
- Customize the appearance by setting the background color of the header, odd columns, and even columns.
- Customize the appearance by setting the background color of the header, odd columns, and even columns.

Sheet Sorting :
- Choose between Ascending or Descending Order for sheet sorting.

Condition & Synchronization :
Note: If you have a large volume of data exceeding 1,000 rows, you must manually add more rows to the sheet, as shown in the image.

- Configure any additional conditions and synchronization settings.
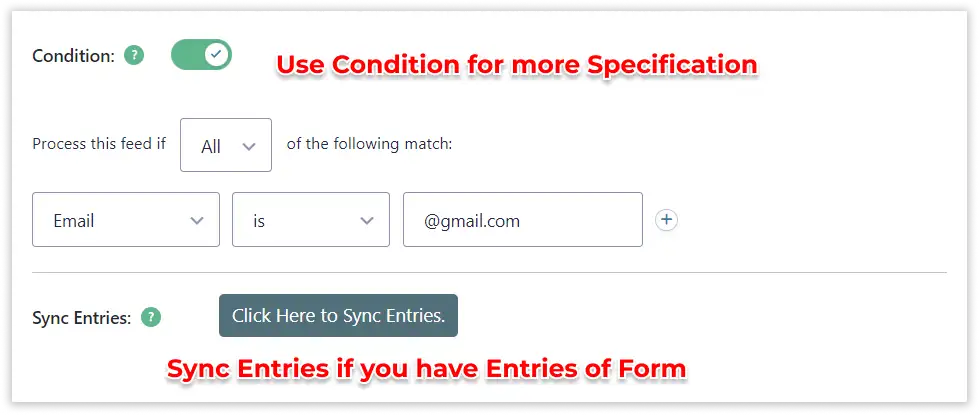
if you don’t have any form Enties then Sync button will not be shown
Save.