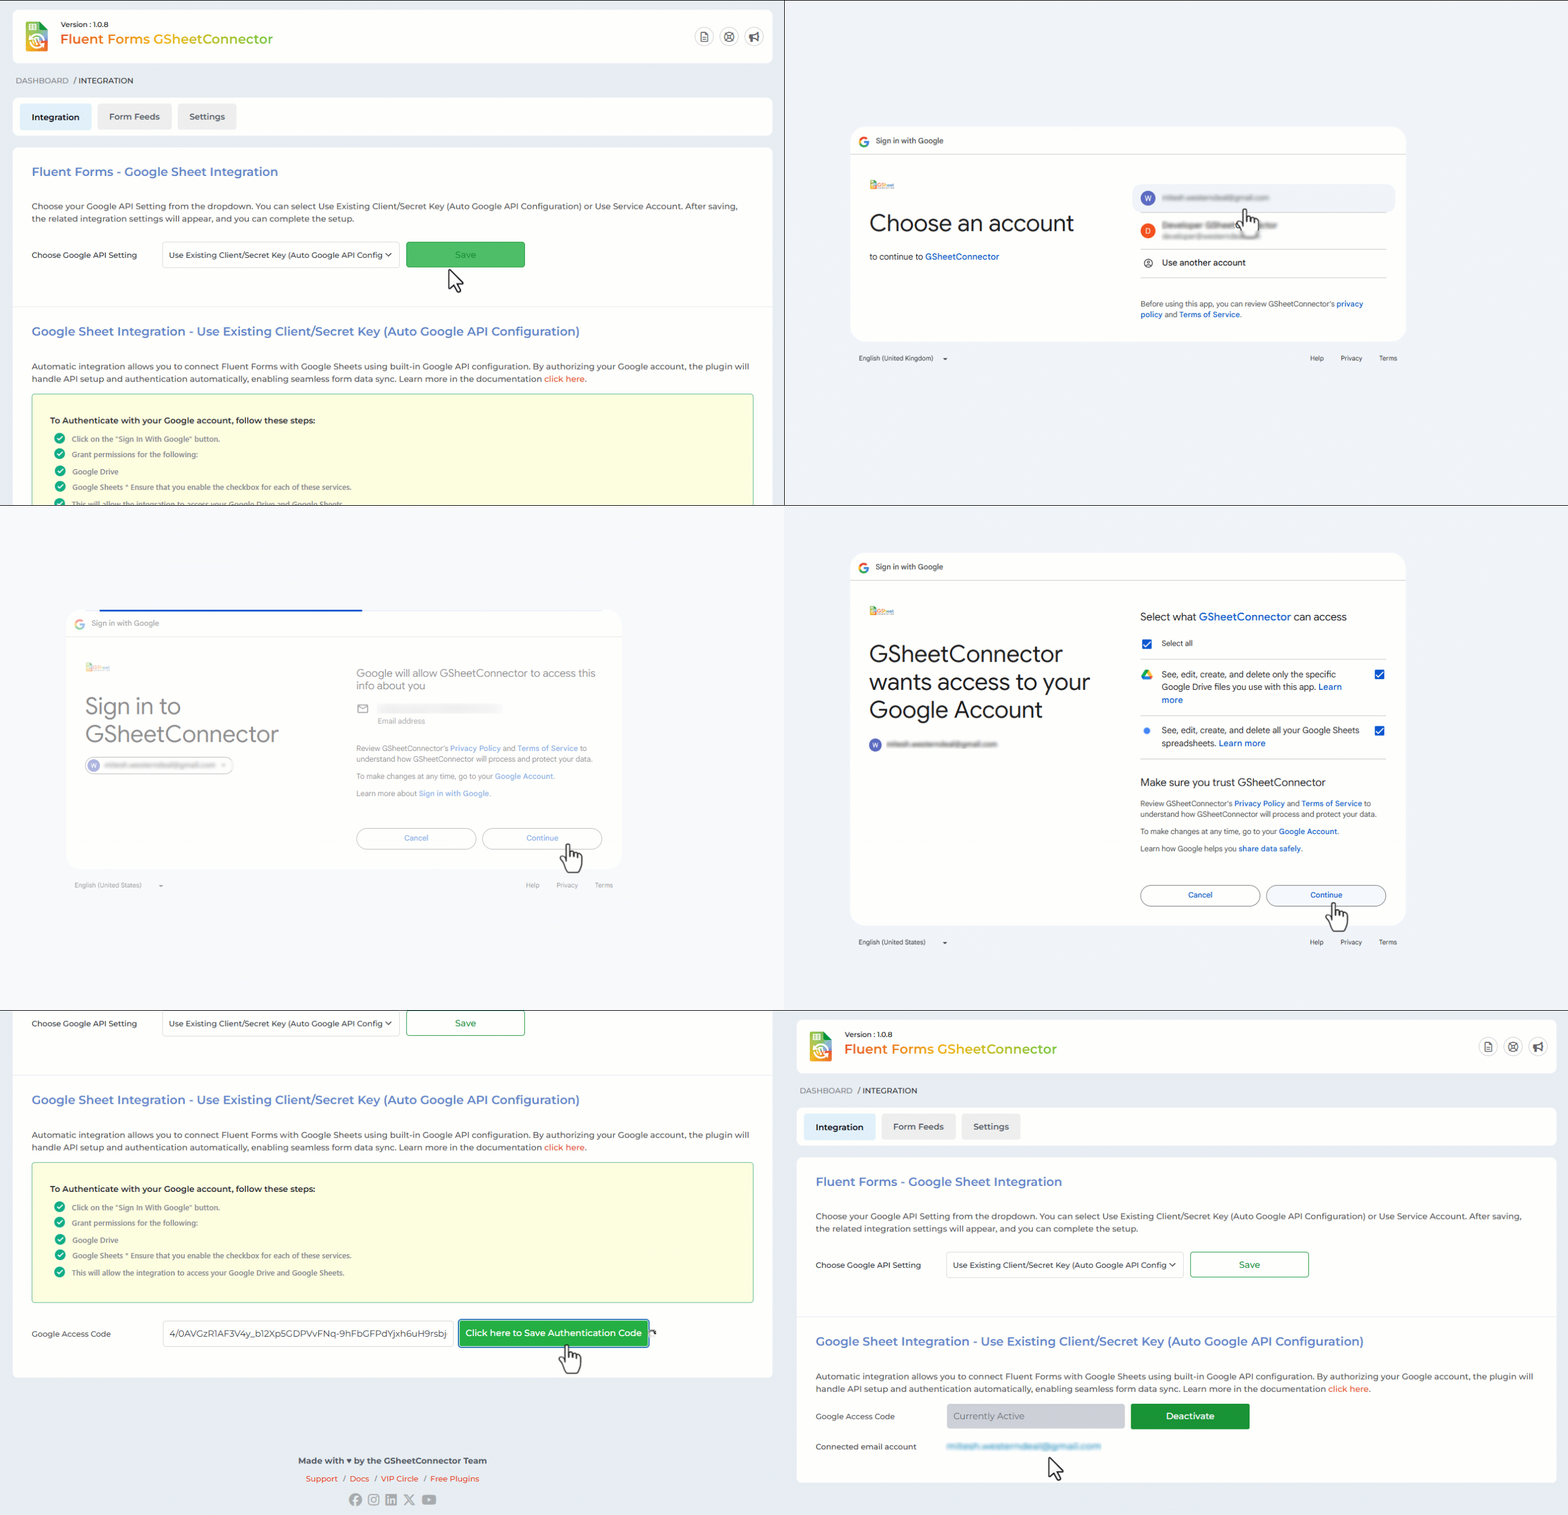
In this knowledgebase article, we’ll guide you step-by-step on how to set up Fluent Forms Google Sheet Connector and configure the most important settings on your website – using the “Existing Client/Secret Key (Auto Google API Configuration)” method.
Our plugin provides multiple ways to connect Google API with Fluent Forms:
-
✅ Use Existing Client/Secret Key (Auto Google API Configuration)
-
✅ Use Manual Client/Secret Key (Auto Google API Configuration)
- ✅ Service Account Setting Pro Version

Step 1: Open Integration Tab
This feature is available in both the FREE and PRO versions of the plugin.
-
From your WordPress Dashboard, go to Fluent Forms → Google Sheet Connector Settings.
-
Click on the Integration Tab.
Step 2: Sign in with Google
-
Click the “Sign in with Google” button.
-
You will be redirected to the Google authentication page.
-
Select the Google Account you want to connect with Fluent Forms.
👉 If you’re not logged in, you’ll be prompted to sign in to your Google Account.
Step 3: Grant Permissions
During authentication, you will be asked to allow permissions for:
-
Google Sheets
-
Google Drive
⚡ Important: Please make sure to check both permission checkboxes.
These permissions are required to:
-
Fetch sheet names & tab names from your account
-
Store Fluent Forms submissions into Google Sheets
-
Update and manage existing records if needed
🔒 Note: We do not store any data from your Google account on our servers. Everything is processed and stored securely in your WordPress database.
Step 4: Authentication Code
-
Once permissions are granted, you’ll be redirected back to the Integration Settings Tab.
-
The Authentication Code will automatically appear inside the input box.
-
Click “Save & Authenticate”.
Step 5: Successful Connection
After successful authentication:
-
The connected Google Account’s email ID will be displayed.
-
You can now associate any Fluent Form with your Google Sheets.


