This guide makes it easy to install Ninja Form and the Ninja Forms Google Sheet Connector Plugin.
Integration of Ninja Form with Google Sheet :
- Ensure that you have successfully integrated (Automatic Integration or Manual Integration) Ninja Form with Google Sheet Connector.
Edit Contact Form :
Go to the Ninja Form Dashboard :
- Log in to your WordPress admin dashboard.
- Navigate to the Ninja Form dashboard.
Edit the Form:
- Locate and edit the specific form that you want to integrate with Google Sheets.
- Locate and edit the specific form that you want to integrate with Google Sheets.

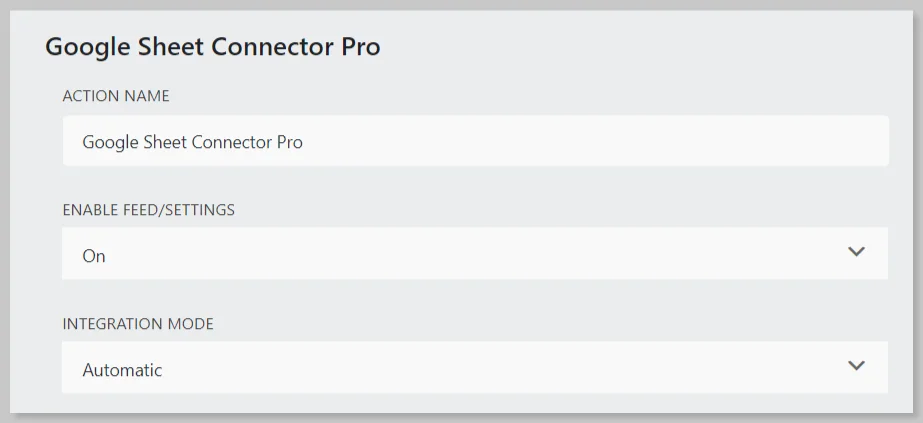
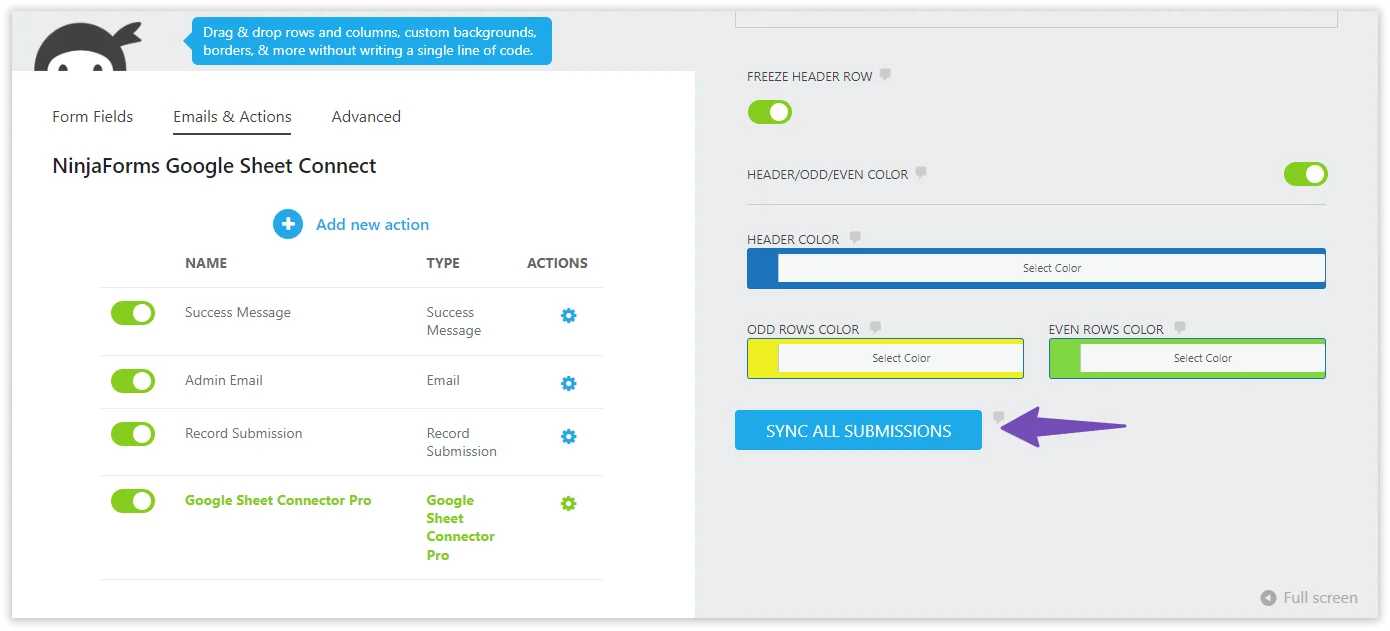
Edit Form – Emails & Actions – Google Sheet :
- In the form editor, go to the “Emails & Actions” tab.
- Click on “Add New Section” and add “Google Sheet Connector Pro.”

Enable Feed and Integration Mode :
- Enable the feed by turning on the switch for “On.”
- Set the Integration Mode to “Automatic.”
Click on Fetch Spreadsheet :
- Click on “Fetch Spreadsheet.”
- Select the Google Sheet Name.
- Choose the specific Tab Name.

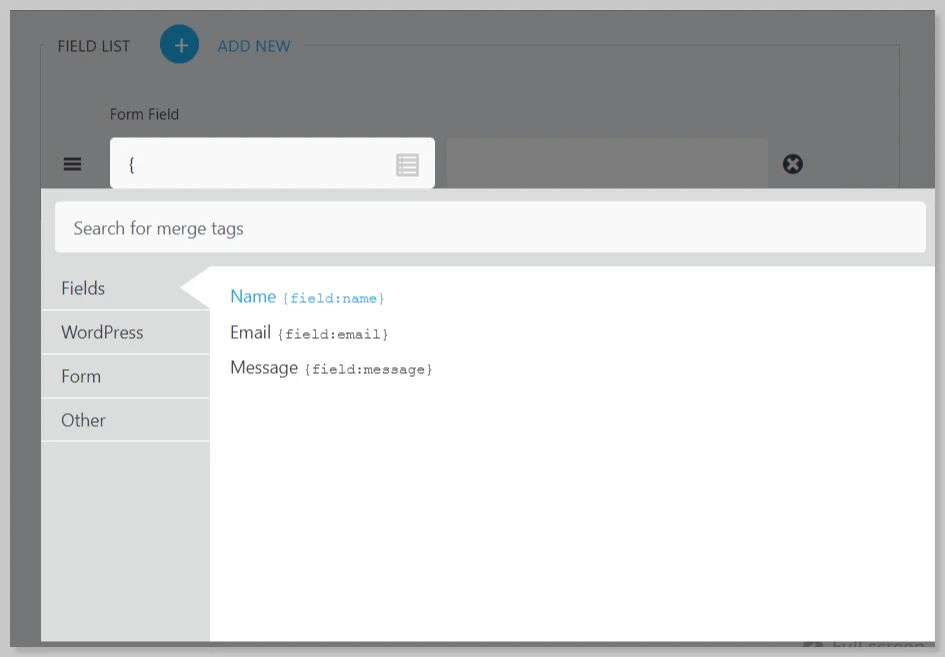
Add Feeds :
- Add feeds based on your requirements. There are different options for adding feeds:
- Add Feed from Fields.
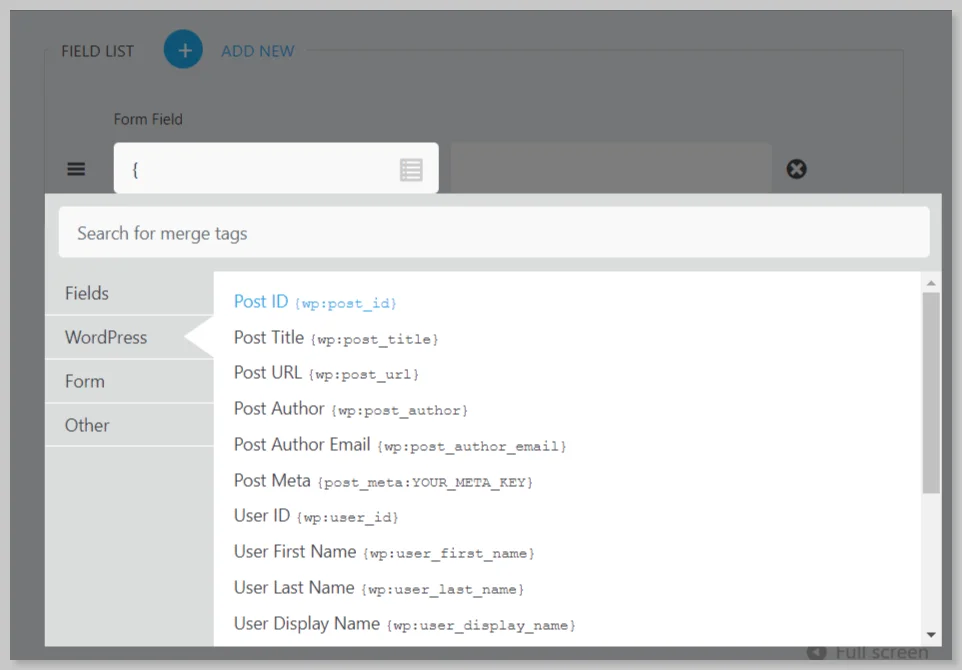
- Add Feed from WordPress.
- Add Feed from Form Default Fields.
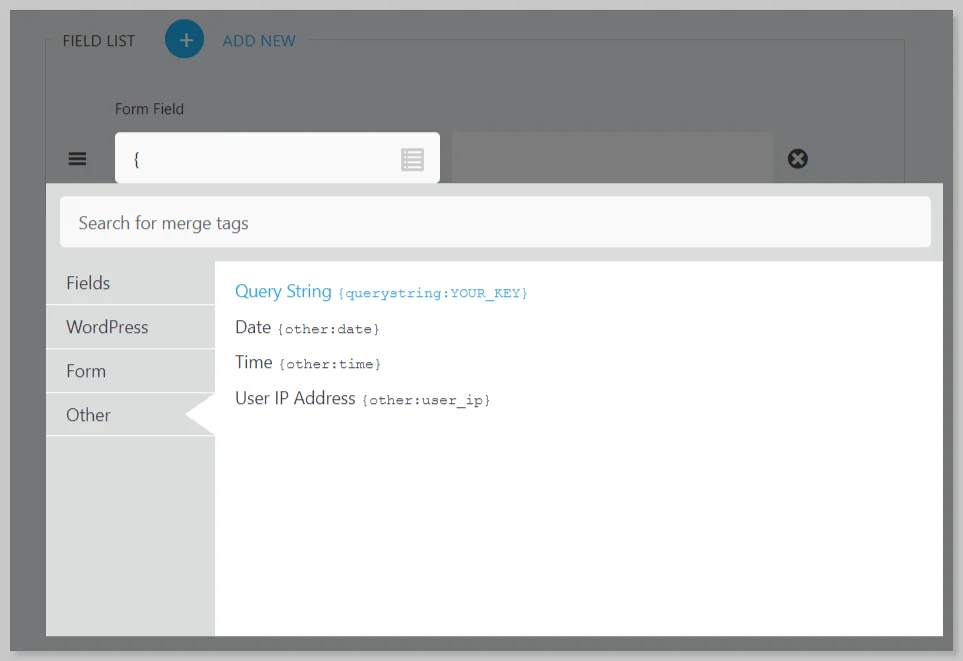
- Add Feed from Other Fields.
- Add Feed from Fields.
- Add Feed from WordPress.
- Add Feed from Form Default Fields.
- Add Feed from Other Fields.

- Add Feed from Fields.
.
- Add Feed from WordPress.
-
Add Feed from Form Default Fields.
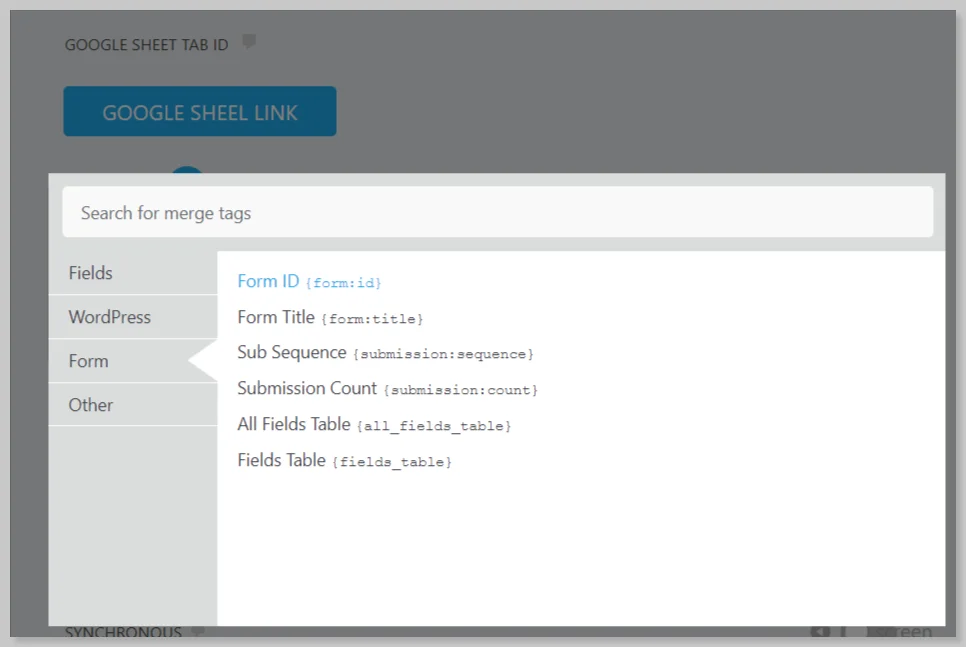
- Add Feed from Other Fields.
Freeze Header :
- Optionally enable “Freeze Header” to make the header sticky.
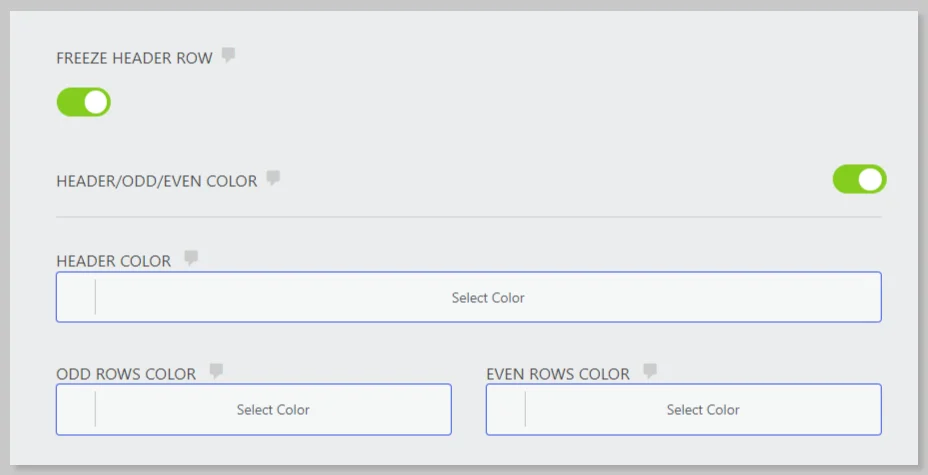
Header/Odd/Even Color :
- Customize the appearance by setting the Header Color, Odd Color, and Even Color.

Synchronous :
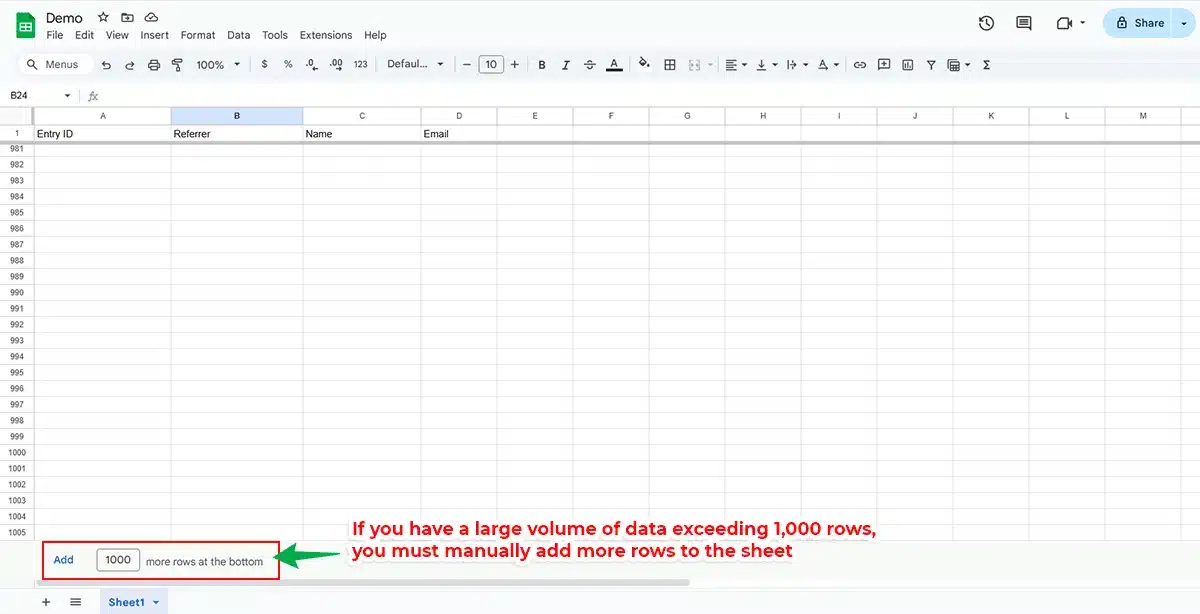
Note: If you have a large volume of data exceeding 1,000 rows, you must manually add more rows to the sheet, as shown in the image.
- Click on “Sync” button to synchronized data.
Publish :
- Click on “Publish” to save and update the form details.
Now, in the connected sheet, all the headers used in the form will be automatically created.
Whenever the form is filled, an entry will be saved in the connected Google Sheet.