Create a Service Account in Google Cloud
Step 1: Open Google Cloud Console
-
From the top project dropdown, select your project (e.g.,
Demo GSheetConnector).
Step 2: Go to IAM & Admin > Service Accounts
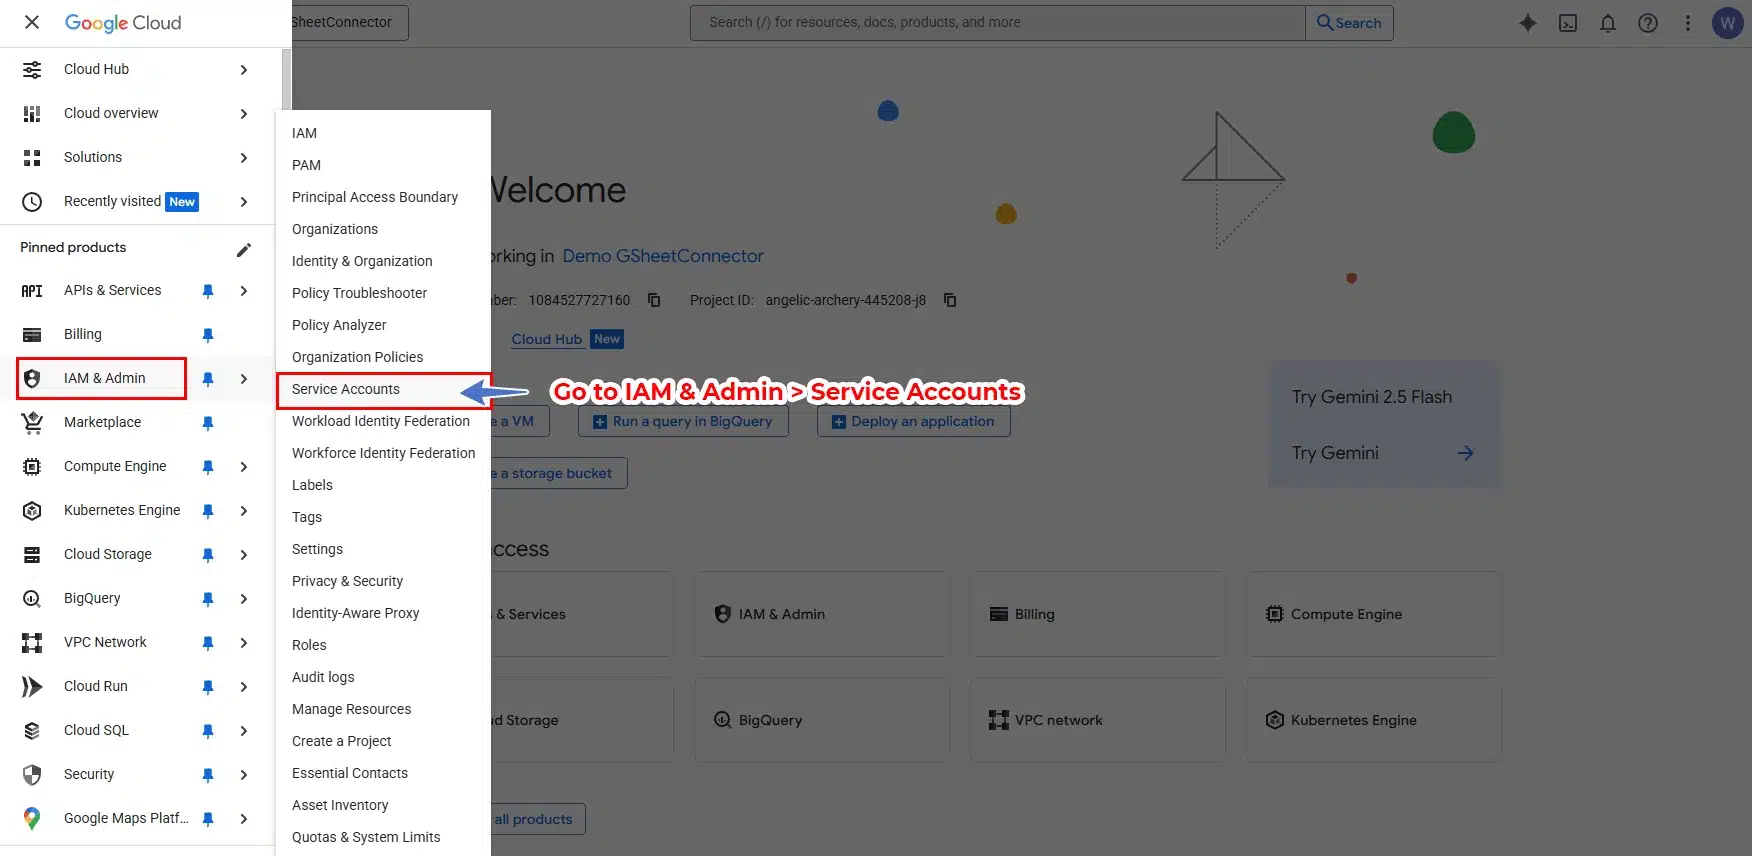
(As shown in your screenshot)
-
From the left sidebar, click IAM & Admin.
-
In the dropdown, click Service Accounts.
Step 3: Create a New Service Account
Click the “+ CREATE SERVICE ACCOUNT” button at the top.

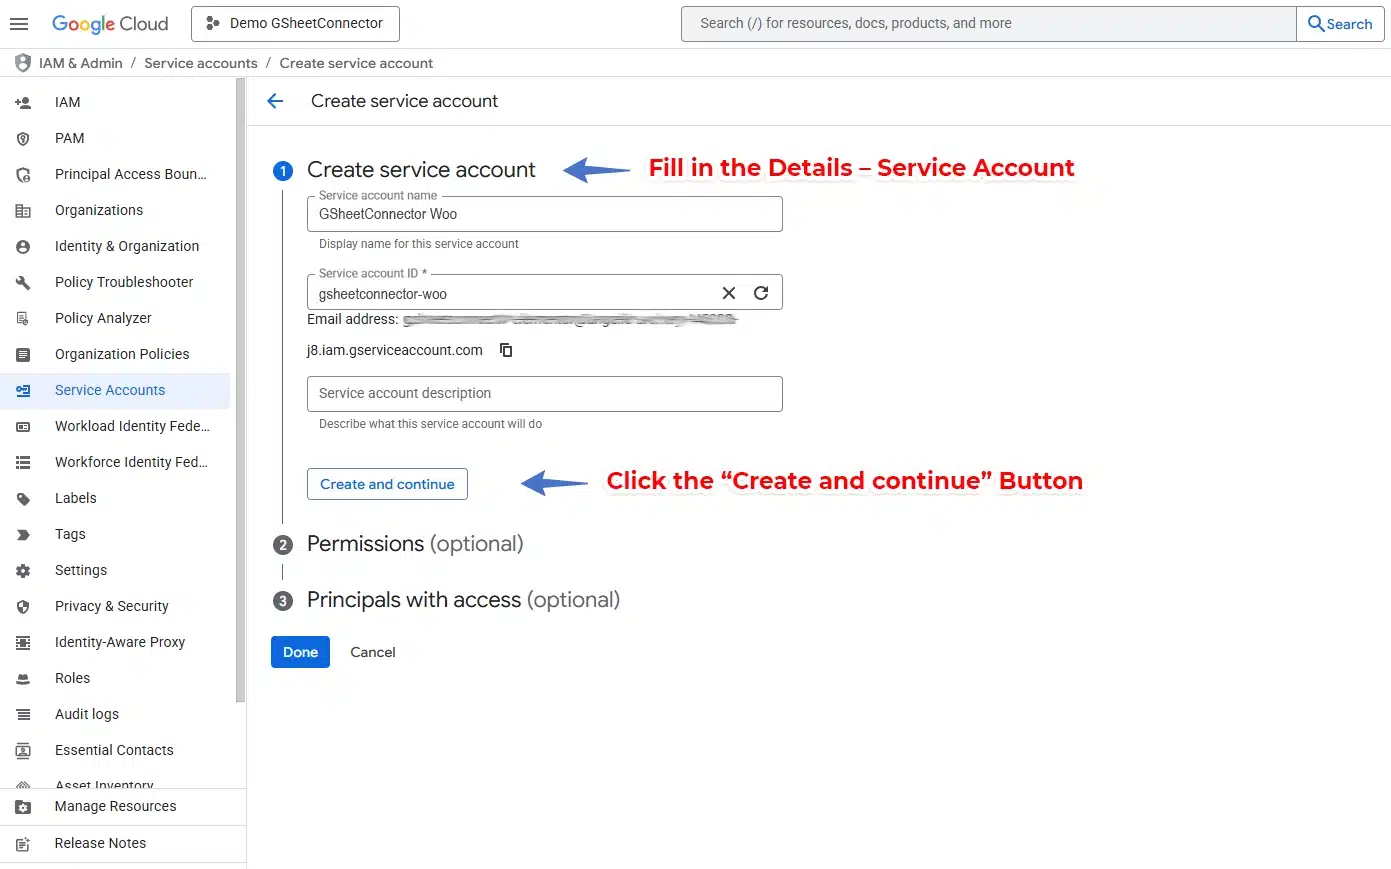
-
Fill in the details:
-
Service account name: (e.g.,
elementor-gsheet-sync) -
Description (optional)
-
-
Click Create and Continue
Step 4: Grant Permissions to the Service Account
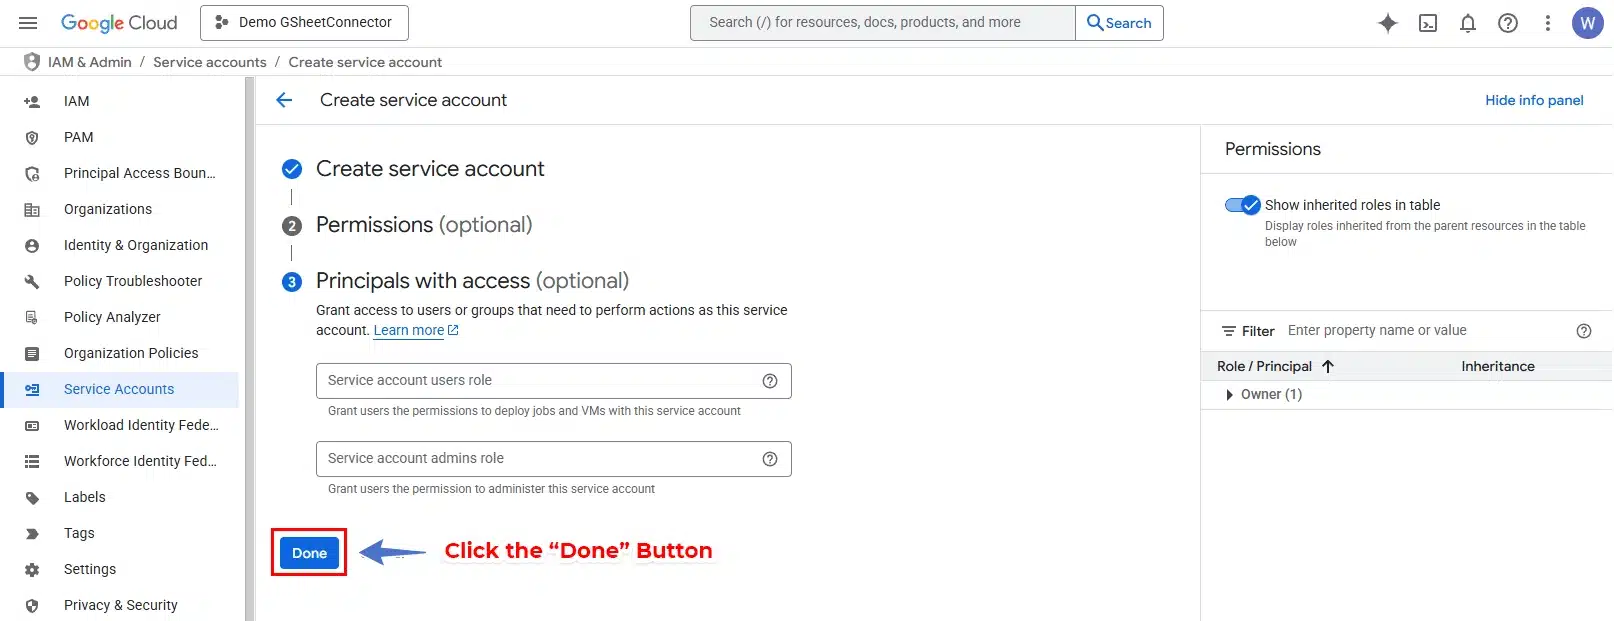
-
Under “Grant this service account access to the project,” select:
-
Role: Editor
-
(Or if you want limited access:
Sheets API EditorandDrive API User)
-
-
Click Continue, then click Done
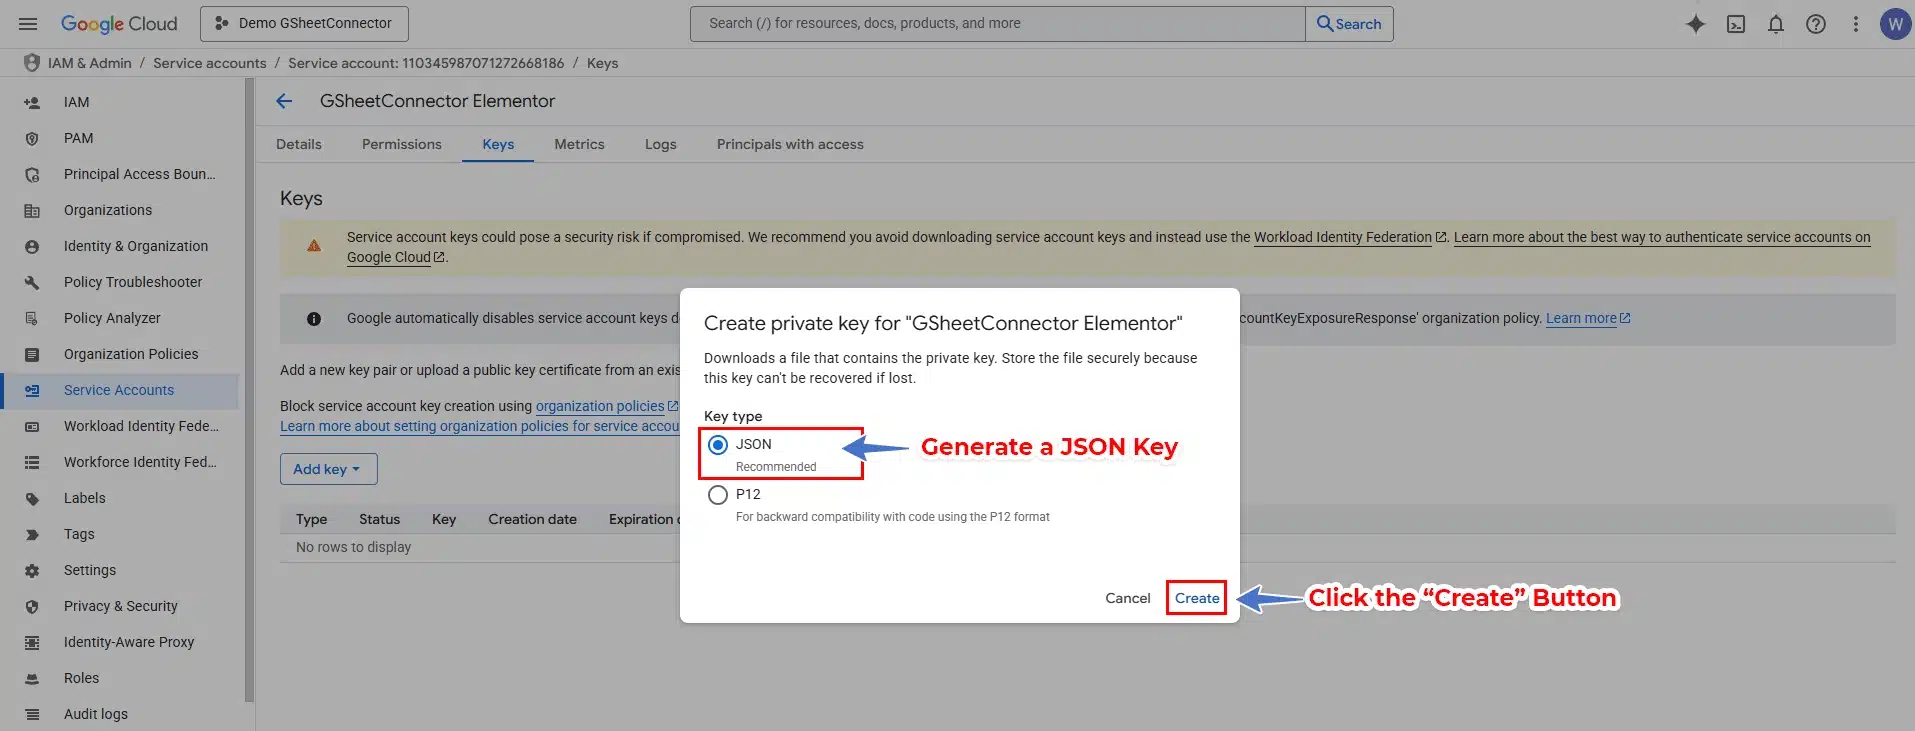
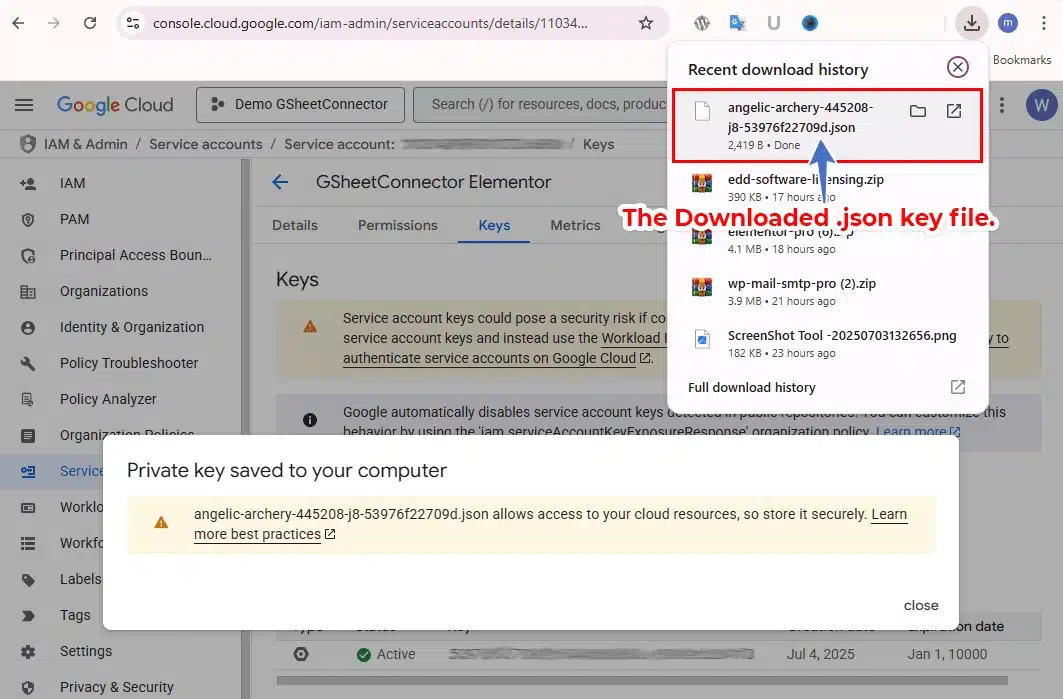
Step 5: Generate a JSON Key

-
From the list of service accounts, click on the one you just created.
-
Go to the “Keys” tab.
-
Click “Add Key > Create New Key”
-
Choose JSON and click Create.
-
A
.jsonfile will be downloaded to your computer.
???? Keep this file safe. You will need it in the plugin.
Once your service account is created, you need to provide Google Drive API and Google Sheets API permissions.

1. Search for APIs and Services to Enable Google Drive API.

2. Click on Enable.

3 Click on APIs and Services and go to Library page.

4. Enable Google Sheets API.

5. Click on Enable.

Connect the Service Account in WC GSheetConnector Pro
Step 6: Upload the JSON Key in the Plugin
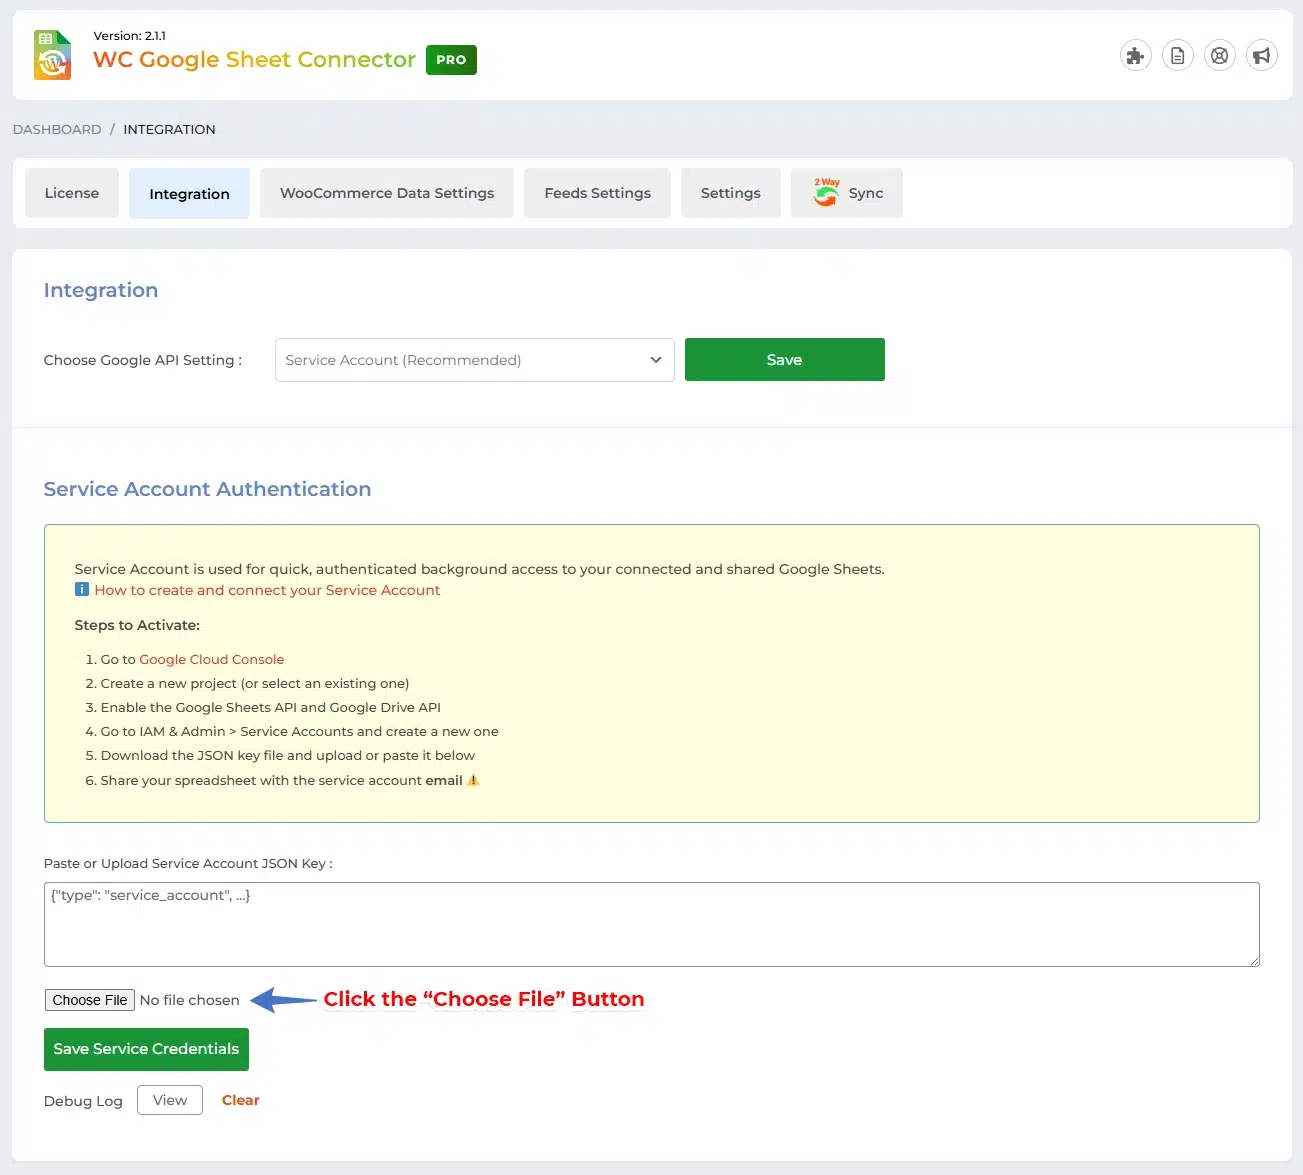

-
In WordPress admin, go to:
WC GSheetConnector Pro > Settings -
Under Authentication Method, select:
????Service Account -
Upload the downloaded
.jsonkey file. -
Click Save Changes
- Your Service Account has been authenticated successfully.


Step 7: Feed Setting
1️⃣ Create a Google Sheet
- Go to Google Drive and create a new Google Sheet.
2️⃣ Share the Sheet with the Service Account Email
-
Share the newly created sheet with your Service Account email ID (the one you connected in the plugin). (e.g., your-service-account@project-id.iam.gserviceaccount.com)
-
Make sure to give at least Editor permission.
Share the newly created sheet with your Service Account email ID (the one you connected in the plugin). (e.g., your-service-account@project-id.iam.gserviceaccount.com)
Make sure to give at least Editor permission.

3️⃣ Create and Edit a Feed
-
In the plugin settings, create a new Feed.
-
Then click on “Edit Feed” to configure it.
In the plugin settings, create a new Feed.
Then click on “Edit Feed” to configure it.
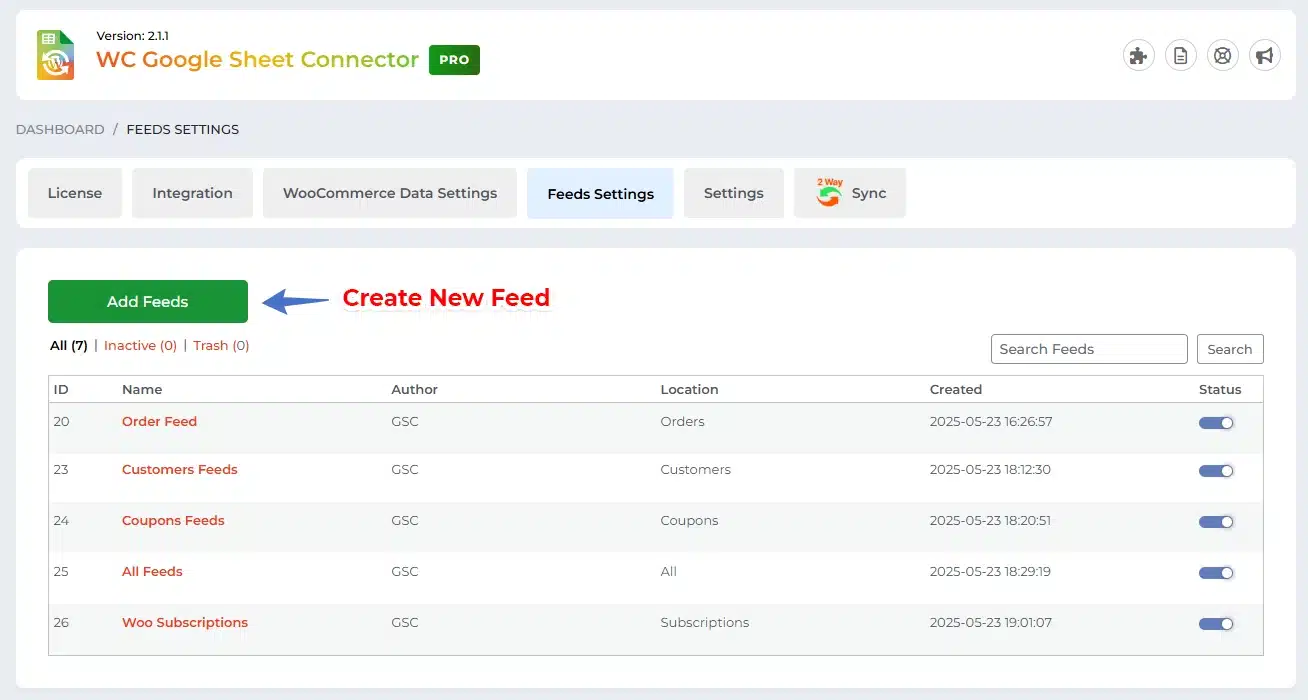

Edit a Feed
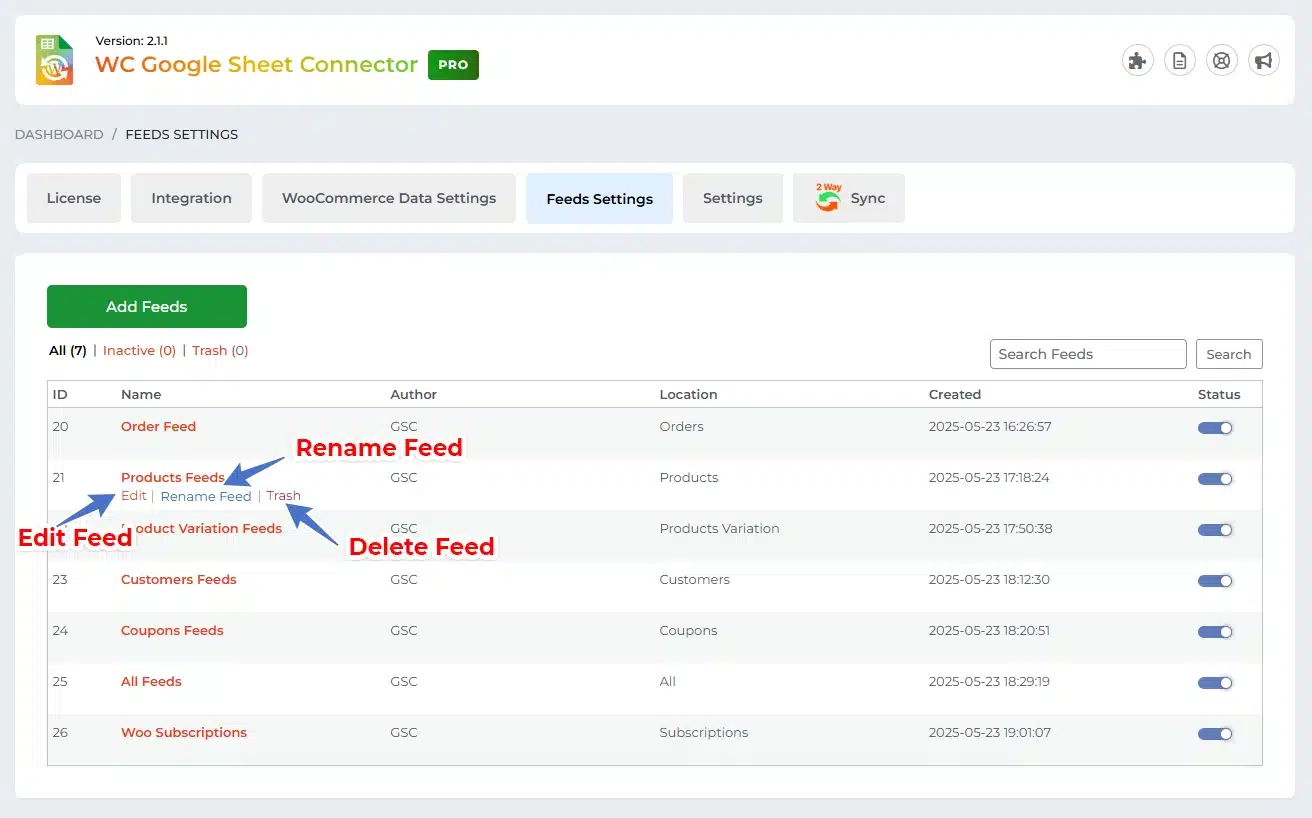
Feed Settings
1 ) Google Sheet Settings
-
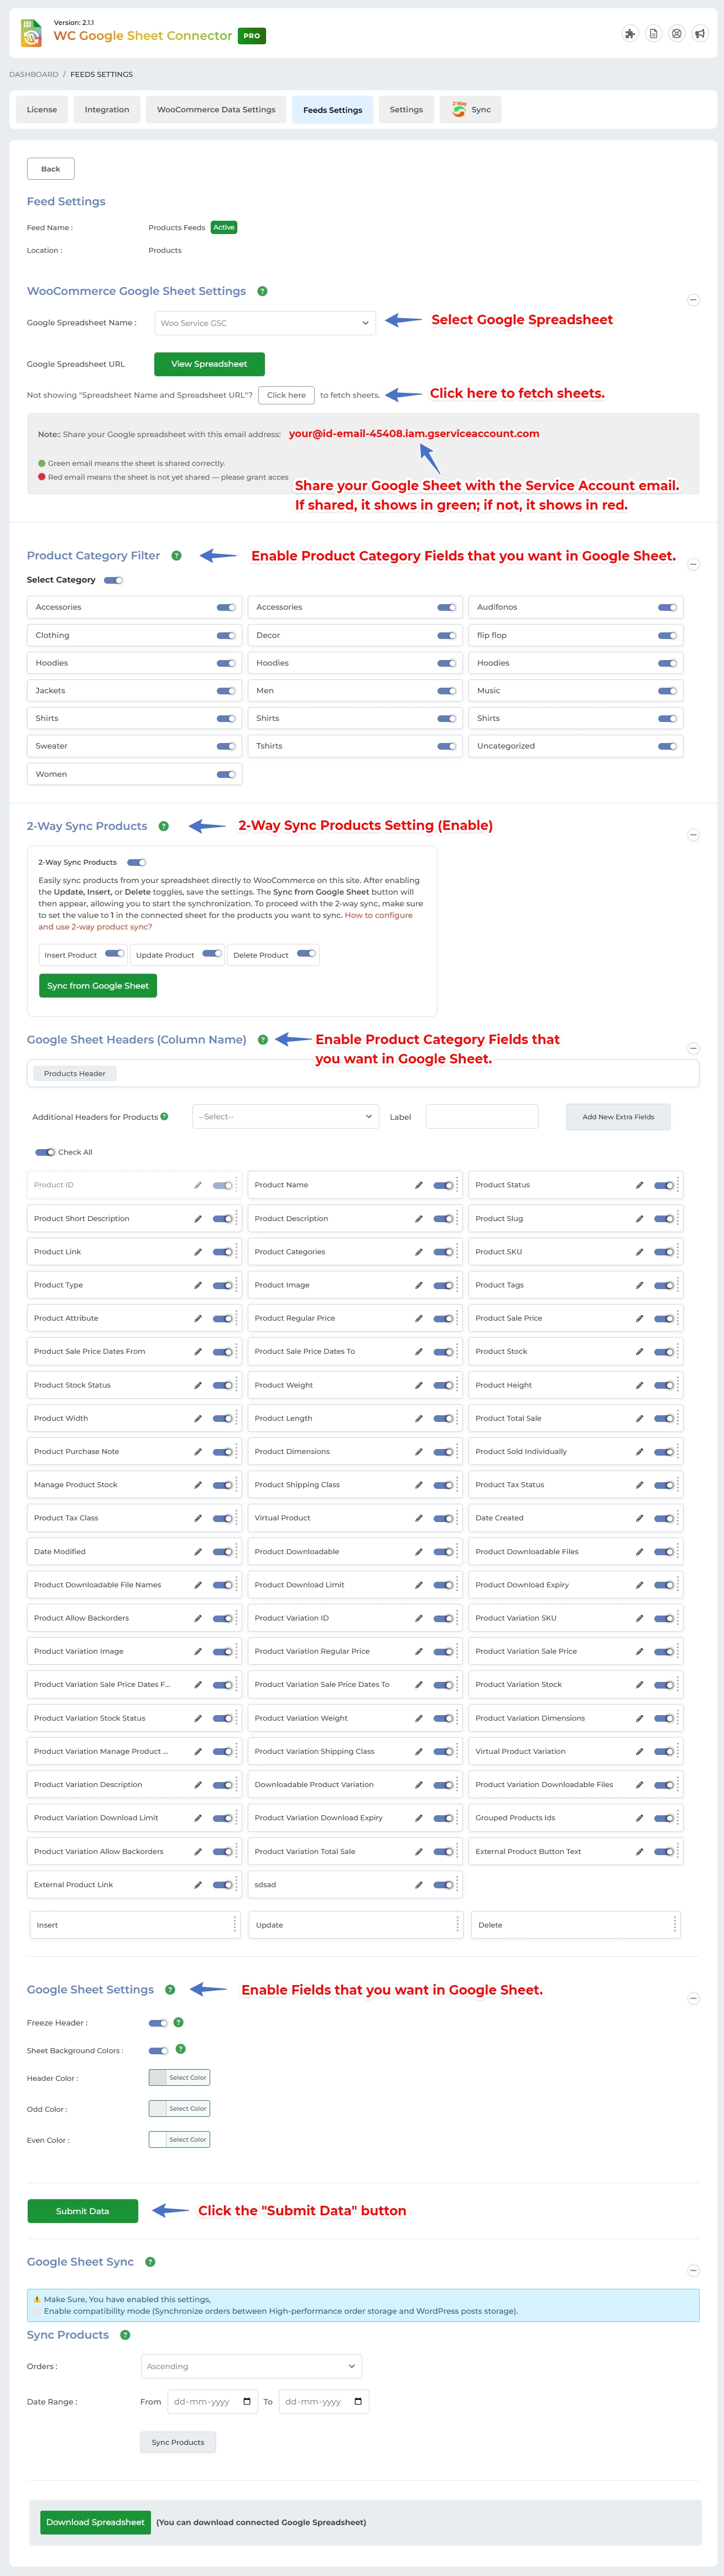
In Google Sheet Settings, all sheets linked to your Service Account email will be fetched automatically and shown in the dropdown.
After that, you can save the field settings and select the desired sheet to store your form data.

-
-
Save the Feed
-
Once saved, when a form is submitted, the selected field labels will appear in the connected Google Sheet.
-
- Your Google Sheet must be shared with the email ID connected via the Service Account.Only if the sheet is shared with this email, it will appear in green below.
If it’s not shared, the email will appear in red.
Sharing your sheet with the Service Account email is mandatory — otherwise, data cannot be sent to the sheet.
-
Now, every new Elementor form submission will be sent to your selected Google Sheet using the service account.
In Feed Settings, whether you choose Auto or Manual, first share your Google Sheet Settings with your Service Account email ID. After saving the Feed Settings, a label will appear in your sheet, and your Service Account email ID will be displayed in green at the top of the Google Sheet Settings section.


 CF7 Google Sheet Connector
 WPForms Google Sheet Connector
 Ninja Forms Google Sheet Connector
 Gravity Forms Google Sheet Connector
 Formidable Forms Google Sheet Connector
 Forminator Forms Google Sheet Connector
 Fluent Forms Google Sheet Connector
 JetFormBuilder Google Sheet Connector
 Elementor Forms Google Sheet Connector
 Avada Forms Google Sheet Connector
 Divi Forms Google Sheet Connector
 WooCommerce Google Sheet Connector
 Easy Digital Downloads Google Sheet Connector
 WordPress Google Sheet Connector