Go to Elementor Form Page :
- Log in to your WordPress admin dashboard.
- Navigate to the page where you have created the Elementor form.
Edit Form :
- Click on the “Edit with Elementor” button to open the Elementor editor.
Add Feed :
- On the left-hand sidebar, find the “Form” widget or element, and drag it onto your page if it’s not already there.
- Edit the form by clicking on it.
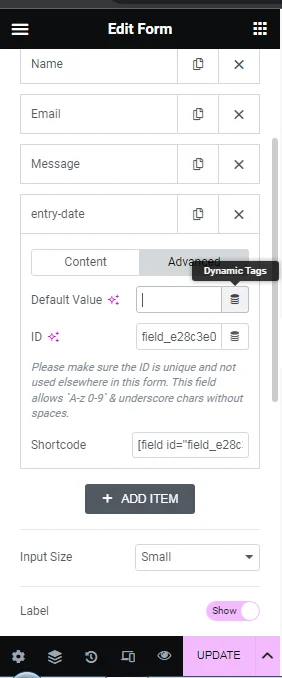
In Content Tab – Select Field Type Hidden :
- Within the form editor, go to the “Content” tab.
- Add a new form field by clicking on the “+ ADD ITEM” icon or an existing field if you prefer to modify an existing one.
- Choose the field type as “Hidden.” This will make the field invisible to users but allow you to capture and process data.

In Advanced Tab – Click on Dynamic Tags :
- Go to the “Advanced” tab for the hidden field.
- Look for the “Dynamic Tags” option and click on it.
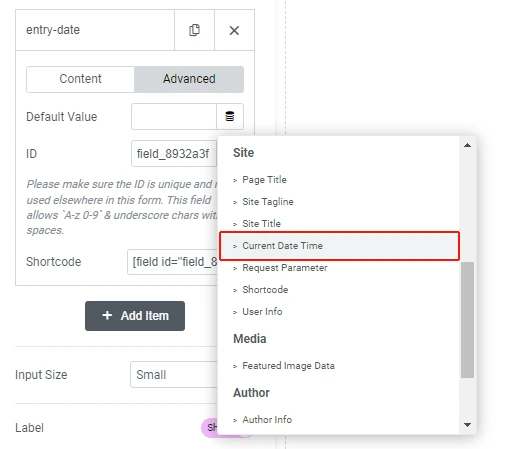
Select Postdate :
- From the list of dynamic tags, find and select “Postdate.” This tag will dynamically fetch the current date and time when the form is submitted.
Update :
- Save your changes by clicking the “Update” button or the equivalent save option in Elementor.
if Problem :
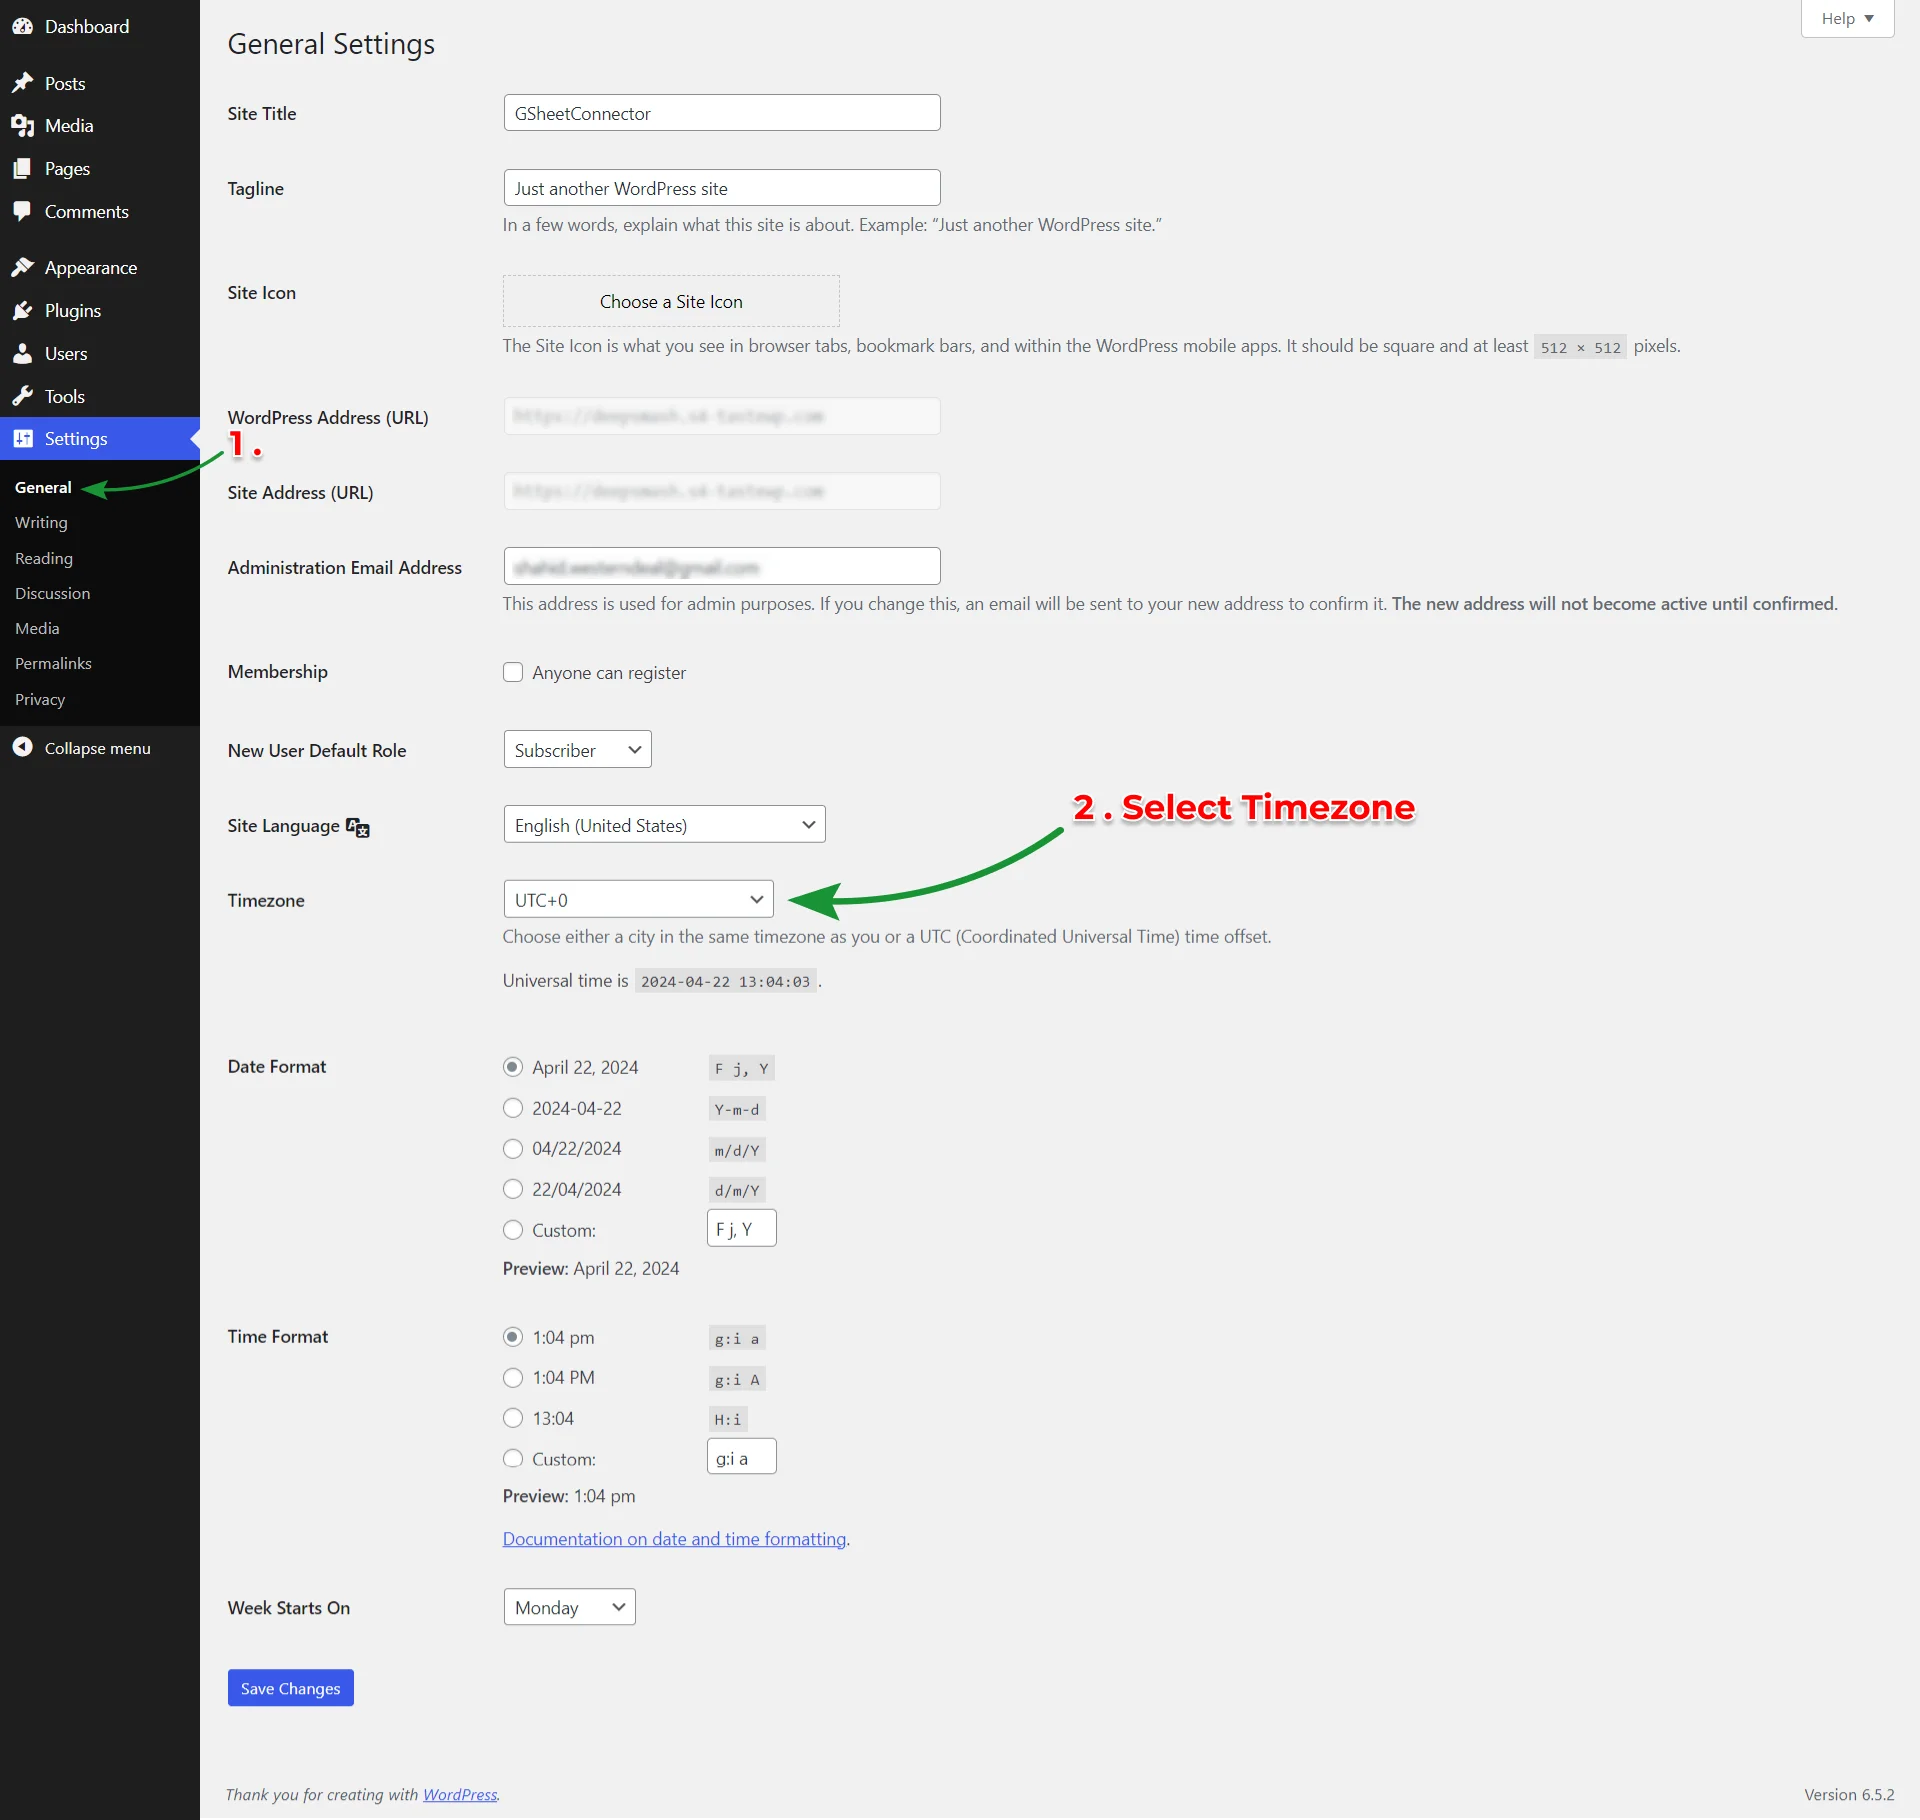
If you can’t find the entry date based on your country, go to the WordPress Dashboard. Then, click on ‘Settings’ and go to ‘General Settings’.